Knowing how to measure kitchen cabinets correctly is one of the most important early steps in planning a new kitchen. Accurate measurements help determine which cabinet sizes will fit, where appliances can go, how much filler space may be needed, and whether the final layout will work with windows, doors, plumbing, electrical connections, and other fixed features.
At Columbus Cabinets City, we recommend measuring the entire kitchen rather than measuring only the cabinets that are already there. Existing cabinets may not use the full wall correctly, and a new layout may change where base, wall, pantry, or appliance cabinets are placed. A complete room measurement gives us much more useful information for planning a new cabinet design.
This guide explains how to measure for kitchen cabinets step by step, including wall dimensions, ceiling height, doors, windows, appliances, utilities, existing cabinets, islands, corners, and linear feet. It also covers common measuring mistakes and explains when preliminary homeowner measurements should be followed by a professional field measurement before cabinets are ordered.
What Should You Measure Before Ordering Kitchen Cabinets?
Before ordering cabinets, measure the room itself, not just the existing cabinetry. A useful kitchen measurement should include every wall where cabinets may be installed, ceiling height, windows, doors, appliance locations, plumbing, electrical outlets, gas connections, vents, soffits, columns, and other obstacles that may affect the cabinet layout. Cabinet manufacturers and designers commonly use this same room-first approach when starting a kitchen plan.
We also recommend recording the location of each feature in relation to a fixed corner rather than writing down only its width. A 36-inch window does not tell us enough by itself. We also need to know where that window begins and ends on the wall, how high the sill is from the floor, and whether the trim or opening affects nearby cabinet doors or countertops.
Tools You Need to Measure Kitchen Cabinets
You do not need specialized equipment to create a useful preliminary kitchen measurement, but reliable tools make the process easier and reduce mistakes. A good tape measure, pencil, paper, straightedge, level, and phone camera are enough for most homeowners. A laser measure can also be helpful for long walls, although we still recommend checking important dimensions with a tape measure before using them for design planning.
Record all measurements in inches rather than switching between feet and inches. Cabinet widths, appliance dimensions, fillers, and most kitchen design specifications are commonly discussed in inches, so using one unit throughout the sketch reduces conversion mistakes. Several cabinet measurement guides also recommend labeling each wall and photographing the room so the measurements can be matched to the actual space later.
A basic measuring kit should include:
- 25-foot tape measure
- Pencil
- Notepad or graph paper
- Straightedge
- Carpenter’s level or laser level
- Calculator
- Phone or camera for reference photos
How to Measure for Kitchen Cabinets
When homeowners ask us how to measure for kitchen cabinets, we recommend following a consistent order around the room rather than jumping between walls and features. Start with a rough floor plan, then measure complete wall lengths, ceiling height, openings, appliances, utilities, and obstacles. Once those dimensions are recorded, you can add existing cabinet measurements if the current layout will remain similar.
The measurements you provide at the beginning do not need to look like an architectural drawing. What matters is that every wall and important feature is clearly labeled and tied to accurate dimensions. A designer can turn a simple sketch into a cabinet layout, but missing information about a doorway, refrigerator, vent, or plumbing location can create problems later.
Step 1: Draw a Rough Kitchen Floor Plan
Start by drawing the basic shape of the kitchen from a bird’s-eye view. The sketch does not need to be perfectly to scale. Show every wall that may receive cabinets and label each wall with a letter or number so the measurements are easy to follow during design discussions.
Include major openings and permanent features such as windows, doors, walkways, columns, fireplaces, radiators, or unusual wall angles. We also recommend taking a clear photo of each wall from across the room. Photos help us understand what the measurements represent and can reveal details that are easy to forget on a simple sketch.
Step 2: Measure Each Wall from Corner to Corner
Measure the full length of every wall that could contain cabinetry. Start at one corner and measure to the next permanent wall or opening, recording the dimension directly on the sketch. We recommend measuring in inches and avoiding rounded numbers because even a small difference can affect fillers, appliance spaces, and cabinet combinations.
For important cabinet walls, it can be useful to measure the wall at more than one height. Walls are not always perfectly straight or parallel, especially in older homes. If the measurements differ, record the variation rather than choosing the larger dimension. That information helps the designer plan realistic filler space and prevents a cabinet run from being designed too tightly.
Step 3: Measure Floor-to-Ceiling Height
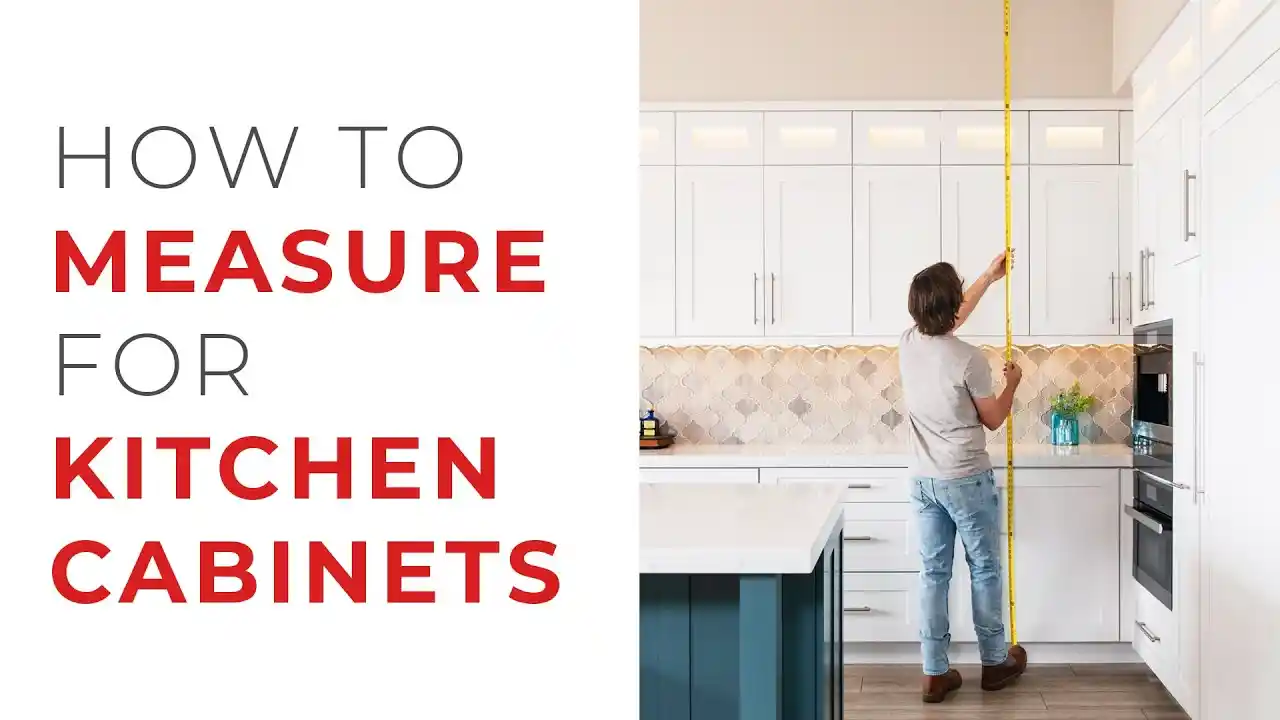
Measure from the finished floor to the ceiling in several locations around the kitchen, including near the corners and through the middle of long cabinet walls. Ceiling height affects wall cabinet height, stacked cabinetry, crown molding, refrigerator cabinets, tall pantry units, and the amount of open space that may remain above the cabinets.
If your kitchen has soffits, bulkheads, beams, dropped ceilings, or areas where the ceiling height changes, show those separately on the sketch and include their width, depth, and height. Manufacturer measurement guides consistently treat ceiling height and overhead obstructions as essential cabinet-planning dimensions.
Step 4: Measure Doors and Openings
Measure every doorway, open passage, pantry opening, and other break in the wall. Record the opening width and its position by measuring from a fixed corner to one side of the opening, then from the opening to the next corner or fixed reference point. Depending on the design process, the trim dimensions may also need to be recorded separately.
Door swing is easy to overlook but can affect cabinet placement. Mark which direction each door opens and how far it travels into the room. A cabinet, refrigerator door, or pantry pull-out should not be designed in a location where it interferes with a nearby door. Accurate opening measurements are a standard part of professional kitchen measurement guides.
Step 5: Measure Windows
For each window, record its overall width and height and show where it sits along the wall. Measure from the nearest corner to the edge of the window or trim, then record the distance from the finished floor to the bottom of the sill. It is also useful to note the distance from the top of the window to the ceiling.
Window measurements are especially important when a sink base is planned below the window or when wall cabinets will sit beside it. We also recommend noting the window swing or operating style if the window opens inward or could interfere with a faucet, countertop, backsplash, or cabinet hardware.
Step 6: Mark the Sink and Plumbing Locations
If the sink and plumbing will remain in approximately the same location, measure from a fixed wall or corner to the centerline of the drain and water supply area. Record this information on the floor plan rather than simply writing “sink” in the general area.
Plumbing locations can influence sink base width, dishwasher placement, corner cabinet planning, and the amount of modification needed during installation. If the plumbing will be relocated, mark both the existing and desired locations. This gives the designer a clearer understanding of which parts of the new layout depend on additional plumbing work.
Step 7: Mark Electrical, Gas, and Vent Locations
Record the location of electrical outlets, switches, gas connections, range wiring, refrigerator outlets, microwave connections, vents, and any other services that may affect the cabinet plan. Measure each important connection from a fixed corner or wall so the location can be reproduced accurately on the design.
Utilities are particularly important around ranges, microwaves, dishwashers, refrigerators, and appliance garages. Cabinet planning guides from manufacturers consistently recommend showing electrical, plumbing, gas, and vent locations because moving these services after cabinets are ordered can add unnecessary work and cost.
Step 8: Measure Your Appliances
Measure the width, height, and depth of appliances that will remain in the new kitchen, and write down the exact model numbers when available. This includes the refrigerator, range, dishwasher, microwave, wall oven, cooktop, wine refrigerator, and any other appliance that affects cabinetry.
If you are buying new appliances, use the manufacturer’s specifications rather than estimating the opening from a showroom display. Appliance clearances can differ from the appliance’s visible dimensions, and refrigerator doors may need additional side space to open fully. Planning the cabinetry around confirmed appliance specifications reduces the risk of an appliance opening being too narrow or poorly positioned.
Step 9: Mark Soffits, Columns, Pipes, and Other Obstacles
Anything that reduces usable cabinet space should appear on the kitchen sketch. This includes soffits, structural posts, exposed pipes, radiators, vents, access panels, low beams, chimneys, and walls that change depth. Record the width, height, depth, and location of each obstruction as accurately as possible.
These details are easy to overlook because they may not seem related to cabinetry at first. In practice, a pipe chase or soffit can affect wall cabinet height, filler requirements, pantry depth, crown molding, or the location of an entire cabinet run. Cabinet measurement guides specifically call out fixed obstructions as essential planning information.
Step 10: Take Photos of the Kitchen
Take wide photos of each kitchen wall as well as closer photos of plumbing, appliances, corners, soffits, and unusual features. The photos should complement the measurements rather than replace them. A measurement tells us the size of a feature, while the photograph helps explain its relationship to everything around it.
At Columbus Cabinets City, visual references are especially useful when discussing preliminary kitchen layouts. A designer can often identify an obstacle, trim detail, or unusual corner from a photo that may not have been obvious from a hand-drawn plan. Manufacturer measuring guides also recommend photos for this reason.
How to Measure Existing Kitchen Cabinets
If you plan to keep approximately the same kitchen footprint, measuring the existing cabinets can provide useful reference information. Measure each cabinet from the outside edge of the box or face frame to the opposite outside edge, then record the width, height, and depth. Label the cabinet by one of the common kitchen cabinet types, such as base, wall, tall, corner, sink, drawer, or appliance, so the measurements remain easy to understand.
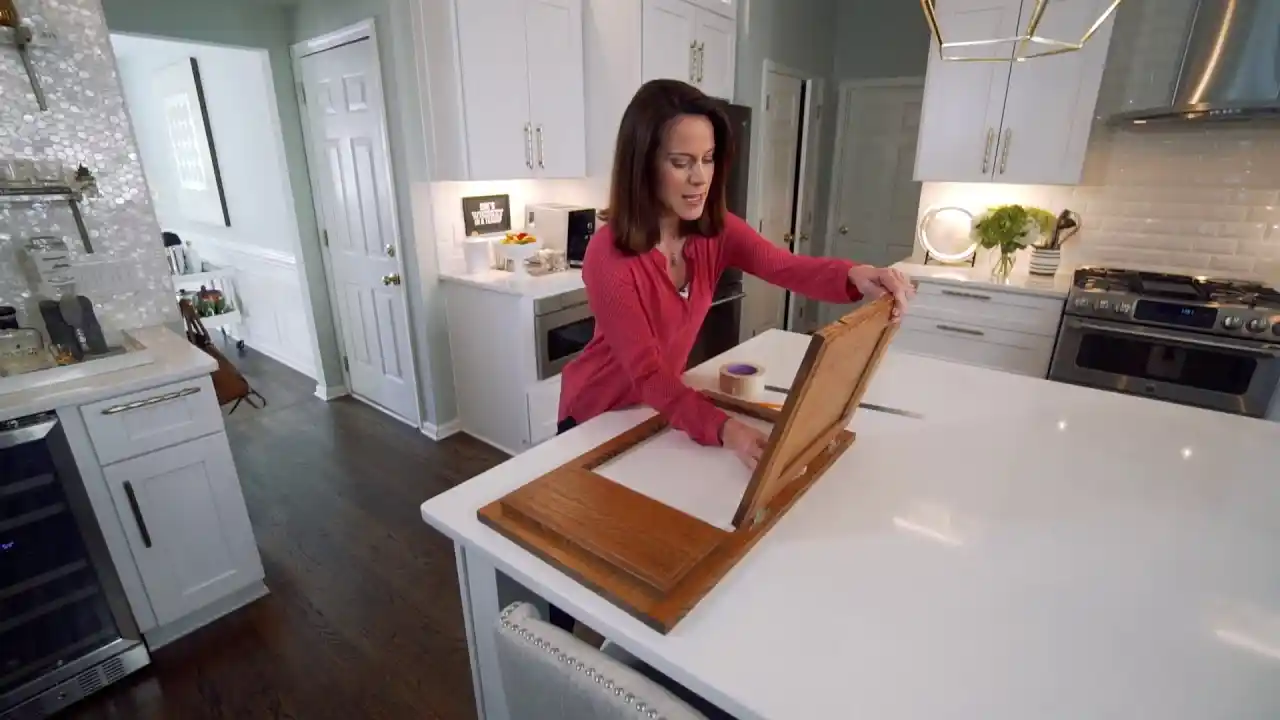
Existing cabinet dimensions should not replace room measurements. The current cabinets may contain unnecessary fillers, leave unused wall space, or use sizes you do not want in the new layout. We use existing cabinet measurements as reference information while the wall, opening, appliance, and utility measurements remain the foundation of the new design.
How to Measure Base Cabinets
Measure the outside width of each base cabinet from one side to the other, then record its height and depth. Standard kitchen base cabinets often follow common dimensional conventions, but do not assume your existing cabinets match a standard size, especially in older or custom kitchens.
Also note whether the cabinet contains doors, drawers, a sink, pull-outs, or other features. When planning replacements, we are not simply trying to duplicate the old boxes. Knowing how the existing storage works helps us determine whether drawer bases, wider cabinets, trash pull-outs, or other configurations could improve the new kitchen.
How to Measure Wall Cabinets
Measure the width, height, and depth of each existing wall cabinet from its outside edges. Also record the distance from the finished floor or countertop to the bottom of the cabinet because this helps us understand the current relationship between wall cabinets, appliances, backsplash, and ceiling.
If the cabinets extend to a soffit or ceiling, record the remaining space above them. The heights available for kitchen wall cabinets can change significantly in a redesign, so these measurements are useful for understanding the existing kitchen but should not automatically determine the new cabinet height.
How to Measure Tall and Pantry Cabinets
Measure tall units and kitchen pantry cabinets from the outside edges and record each one’s total width, depth, and height. Also note their distance from nearby walls, ceilings, appliances, and doorways because tall cabinets can create clearance issues that standard base cabinets do not.
If a pantry cabinet sits beside a refrigerator or wall oven, record the appliance dimensions and any filler or panel between them. These details help us determine whether a new tall cabinet configuration can fit without interfering with appliance doors, trim, crown molding, or surrounding walls.
How to Measure Cabinets for a New Kitchen Layout
When the new kitchen layout will be different from the existing one, focus primarily on the room rather than the cabinets being removed. Measure every usable wall from corner to corner, record openings and obstructions, and identify which services can remain in place and which may be relocated. This gives the designer flexibility to create a better cabinet arrangement instead of simply recreating the old footprint.
We also recommend thinking about how doors, drawers, appliances, and walkways will function after the new cabinetry is installed. A wall may technically be long enough for another cabinet, but that does not mean the cabinet should fill every available inch. Fillers, door clearance, appliance ventilation, countertop overhangs, and walking space all need to be considered before cabinet widths are finalized.
Measure the Kitchen at More Than One Height
One of the most useful ways to identify an irregular room is to measure important cabinet walls at more than one height. A wall can measure one dimension near the floor and a slightly different dimension closer to countertop or upper-cabinet height because the room is not perfectly square.
When those numbers differ, write both measurements down instead of averaging them. For cabinet planning, the smaller available dimension is usually the safer constraint because a cabinet run designed to the longest measurement may not fit at the tightest point. This approach also helps the designer determine where filler strips or scribe material may be necessary.
How to Measure Kitchen Corners
Corners need careful measurement because two cabinet runs meet in the same physical space. Measure each wall independently from corner to corner and show the exact corner relationship on the sketch. Do not try to estimate the amount of space a Lazy Susan, blind-corner, or diagonal corner kitchen cabinet will need before the actual cabinet line is selected.
The cabinet designer will determine the correct corner cabinet size and the amount of clearance required on each wall. Your job during preliminary measurement is to provide accurate wall dimensions and identify nearby obstacles. Corner dimensions should not be counted twice when calculating usable cabinet runs or linear-foot estimates.
How to Measure for an L-Shaped Kitchen
For an L-shaped kitchen, measure each wall from the shared corner to the end of the usable wall and record the dimensions separately. Mark windows, doors, appliances, plumbing, and openings on each leg of the L. The shared corner should appear clearly on the sketch because the cabinet configuration in that area affects both runs.
Do not simply add the two wall lengths and assume every inch will become cabinet space. A corner cabinet occupies part of both walls, and appliances or fillers may interrupt the runs. We use the wall dimensions to build the actual cabinet plan first, then determine the final cabinet widths and linear footage.
How to Measure for a U-Shaped Kitchen
A U-shaped kitchen requires accurate measurements of all three connected walls as well as both inside corners. Start at one end and work around the room in a single direction, labeling each wall clearly. Record wall lengths, windows, doors, plumbing, appliances, and any areas where the walls are not perfectly square.
Small measurement errors can become more important in a U-shaped layout because the cabinet design is constrained from three directions. We recommend taking diagonal or cross-room reference measurements when practical and leaving the final cabinet order until a professional field measurement confirms the critical dimensions.
How to Measure for a Galley Kitchen
In a galley kitchen, measure both opposing walls completely and record the distance between them. The space between the cabinet runs is important because base cabinets, appliance doors, dishwasher doors, drawers, and walkways all need room to function without interfering with one another.
Also identify whether the opposing walls are parallel. If the distance between them changes from one end of the room to the other, record those differences. A galley kitchen can use cabinet space efficiently, but accurate dimensions are essential because even a small planning error can make the aisle or appliance clearances feel too tight.
How to Measure for a Kitchen Island
To measure for a kitchen island, first measure the open floor area after accounting for the surrounding base cabinets and appliances. Do not size the island based only on the center of the room. The usable island dimensions depend on the walking and working clearances that must remain around it.
Mark appliance doors, dishwasher openings, refrigerator swing, range location, and major traffic routes before deciding how large the island can be. If the island will contain a sink, cooktop, outlets, or seating, note those requirements on the plan as well. We prefer to size the island after the perimeter cabinetry is established rather than treating kitchen island cabinets as an independent piece of furniture.
How Do You Measure Linear Feet for Cabinets?
Linear feet measure the length of cabinet runs rather than the floor area or square footage of the room. To calculate linear feet, measure the length of each cabinet run in inches, add the relevant runs together, and divide the total number of inches by 12. Linear-foot calculations are useful for rough budgeting and early estimates of how much kitchen cabinets cost, but they do not determine the final cabinet order.
Be clear about what is being counted when someone discusses cabinets by the linear foot. Base cabinets, wall cabinets, and tall cabinets may be treated differently depending on the seller or pricing method. An 18-foot wall does not necessarily mean 18 feet of base cabinets and 18 feet of wall cabinets because appliances, windows, and other interruptions affect the actual layout.
Calculating Linear Feet for Cabinets
For a simple example, imagine one cabinet run measures 120 inches and another measures 96 inches. Add the two lengths to get 216 inches, then divide by 12. The result is 18 linear feet of measured cabinet run.
That number can be useful for rough planning, but it does not tell us what cabinets will be installed within those 18 feet. A kitchen containing drawer bases, pantry cabinets, corner solutions, finished panels, and specialty accessories can cost much more than another kitchen with the same linear footage but simpler cabinet configurations.
Linear Feet Formula
The basic calculation is:
Total cabinet-run inches ÷ 12 = linear feet
For example:
216 inches ÷ 12 = 18 linear feet
We recommend keeping the original dimensions in inches on your kitchen drawing even after calculating linear feet. Cabinet design is normally completed using individual widths, not one combined linear-foot number, so the wall measurements remain more valuable than the final conversion.
Do You Count Upper and Lower Cabinets Separately?
For design purposes, upper and lower cabinets should be recorded separately because they are different cabinet runs with different heights, depths, and configurations. If a wall has both base and wall cabinetry, do not assume a single linear-foot number fully describes what is being installed.
Pricing methods vary, which is another reason linear-foot comparisons can be misleading. Before comparing cabinet prices by linear foot, confirm whether the figure includes base cabinets, wall cabinets, both together, tall cabinets, installation, trim, hardware, or other components.
Linear Feet vs. Individual Cabinet Measurements
Linear footage is useful for rough budgeting, but actual kitchen cabinets are ordered as individual boxes in specific widths. A 12-foot cabinet run might include a drawer base, sink base, dishwasher opening, corner cabinet, filler, and several wall cabinets rather than one continuous 12-foot product.
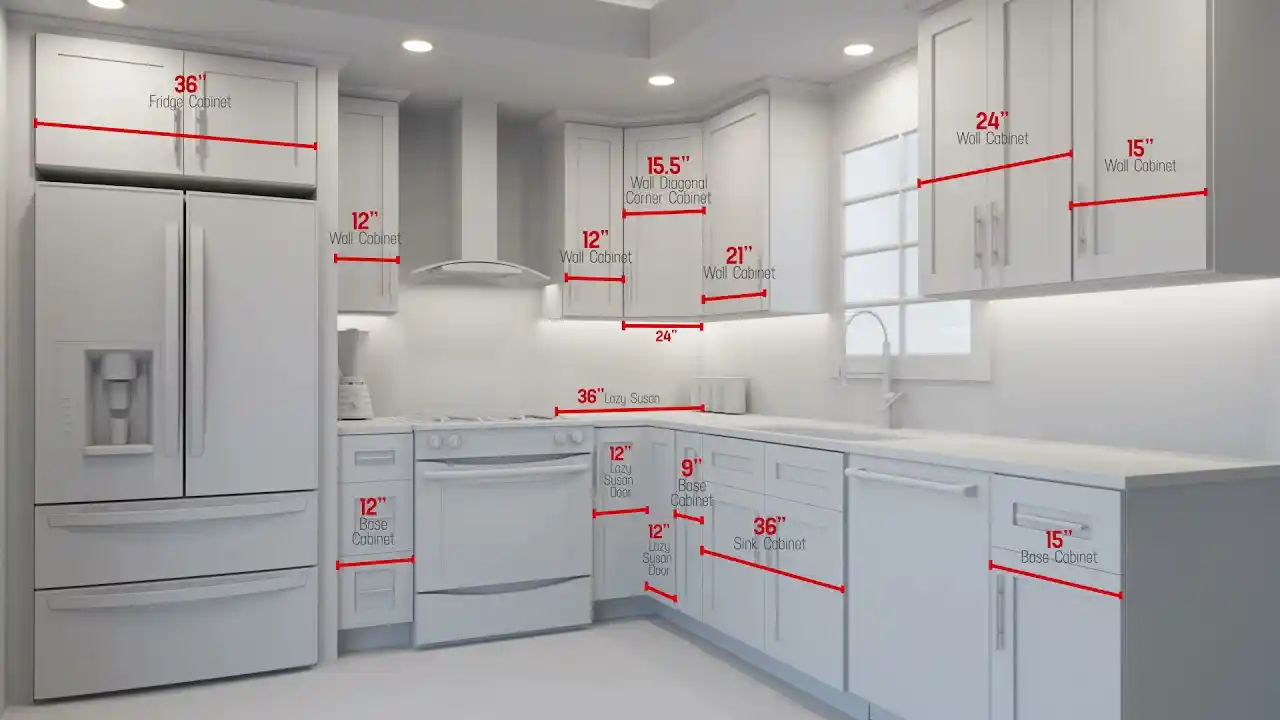
For that reason, we do not recommend designing a kitchen from linear feet alone. Once the room is measured, the next step is creating a cabinet layout that determines which individual cabinet sizes fit. That layout provides a much more accurate foundation for pricing, storage planning, countertops, and installation than one total length measurement.
Do You Measure Kitchen Cabinets from the Inside or Outside?
When measuring existing kitchen cabinets for replacement or reference, measure the outside dimensions of the cabinet box or face frame rather than the usable interior storage space. The exterior width tells us how much wall space the cabinet occupies and allows the measurement to be compared with standard cabinet widths.
Interior measurements are useful when you are buying drawer organizers, pull-outs, shelves, or other storage accessories because those products must fit inside the cabinet opening. For kitchen design and cabinet replacement, however, exterior dimensions and room measurements are the more important numbers.
How to Account for Cabinet Fillers
In cabinet terminology, fillers are intentional strips of material used between cabinets, walls, appliances, or other surfaces. They are not automatically wasted space. Fillers can provide clearance for doors and drawer handles, compensate for walls that are not perfectly straight, and help create a cabinet run that fits standard cabinet widths cleanly.
Do not reduce the wall measurement because you think a filler should be a particular width. Measure the actual room accurately and allow the designer to determine the appropriate filler during layout planning. In many stock and semi-custom cabinet systems, standard cabinet widths and real-world wall conditions make some filler space necessary for a properly functioning installation.
Measure Appliance Door and Drawer Clearances
Cabinet measurements should account for how appliances and cabinet components move, not only where they sit when closed. Refrigerator doors, range doors, dishwasher doors, cabinet drawers, corner cabinet doors, and pantry pull-outs all need sufficient clearance to operate without hitting neighboring cabinets, walls, islands, or hardware.
This is particularly important around corners and narrow aisles. A refrigerator may physically fit inside its opening but still be difficult to use if the door cannot open far enough for drawers to pull out. We recommend showing all major appliances on the floor plan and identifying their door swing before finalizing cabinet widths.
Measure for Countertop Overhangs and End Panels
Although the cabinet boxes determine most of the kitchen footprint, countertops and finished cabinet panels can extend beyond the basic cabinet dimensions. Islands may have seating overhangs, and exposed cabinet ends may receive finished panels that slightly change the overall width of the installation.
These details usually belong in the final design rather than the homeowner’s first rough measurement. However, recording nearby walls, doorways, walkways, and appliances accurately gives the designer enough information to determine whether panels and countertop overhangs will fit without creating clearance problems.
Common Kitchen Cabinet Measuring Mistakes
Most cabinet measuring problems do not come from using the wrong tape measure. They happen because part of the room is missed, a dimension is rounded, or an opening is recorded without showing where it sits on the wall. A kitchen can look rectangular while containing enough variation to affect fillers, tall cabinets, or countertop fit.
We recommend treating preliminary measurements as a complete record of the room rather than a list of cabinet widths. Measuring walls, openings, utilities, appliances, and vertical clearances together gives a designer the information needed to catch conflicts before cabinets are ordered.
Measuring Only the Existing Cabinets
Existing cabinets are useful reference points, but they should not be the only things measured. A previous cabinet layout may leave unused wall space, contain unusually large fillers, or fail to take advantage of available storage.
Measure the entire room so the new design is not unnecessarily limited by the old kitchen. Once we know the real wall dimensions and fixed features, we can decide whether the current cabinet positions should remain or whether a different layout would function better.
Measuring a Wall Only Once
A wall can be wider near the floor than it is higher up, or it may bow slightly in the middle. Measuring the wall only once can hide these conditions and lead to a cabinet run that fits on paper but becomes too tight during installation.
Take critical measurements at multiple heights and record any differences. Do not average them into one number. The designer needs to know where the tightest dimension occurs so appropriate filler or installation tolerance can be included.
Rounding Measurements
Avoid rounding a wall to 10 feet simply because the tape measure is close to 120 inches. Record the actual measurement. A quarter inch or half inch can become important when several cabinets, fillers, appliances, and panels must fit between two fixed walls.
The design process can decide where tolerance is appropriate later. The measuring stage should capture the room as accurately as possible rather than simplifying the numbers before the layout has been created.
Forgetting Trim Around Windows and Doors
Window and door trim can occupy space that affects nearby cabinet doors, countertops, wall cabinets, or crown molding. Record both the opening and relevant trim when it could interfere with the new cabinetry rather than assuming only the glass or doorway width matters.
Photographs are especially useful here because they show whether trim projects into the cabinet area. The final cabinet layout may need filler or additional clearance to prevent doors and drawers from contacting the molding.
Forgetting Appliance Clearances
Appliance openings should not be designed solely from an approximate appliance width. Refrigerators, ranges, wall ovens, dishwashers, and microwaves have model-specific installation and ventilation requirements that should be confirmed before final cabinet ordering.
Record the appliance model whenever possible and keep the manufacturer’s specification sheet with the kitchen measurements. That allows the cabinet designer to build the opening around the real appliance requirements rather than relying on an assumed standard size.
Forgetting Plumbing, Electrical, or Gas Locations
A cabinet layout that ignores utilities may require unnecessary field modifications or expensive relocation work later. Mark the centerline or position of sink plumbing, gas connections, outlets, switches, vents, and appliance services on the drawing.
Even when you plan to move some of these utilities, showing their current locations helps us understand the remodeling scope. It also helps identify areas where cabinet drawers, backs, shelves, or appliance panels may need special consideration.
Measuring Linear Feet Instead of Designing the Kitchen
Linear feet are useful for an early budget estimate, but they are not a substitute for a cabinet layout. Two kitchens with the same linear footage can require completely different numbers of drawers, pantry cabinets, corner units, fillers, panels, and wall cabinets.
Use linear footage as a comparison number only. The final cabinet order should be based on individual cabinet dimensions and a complete kitchen design that has been checked against the actual room measurements.
Preliminary Measurements vs. Final Cabinet Measurements
Homeowner measurements are extremely useful for starting a design, discussing layout possibilities, and building an early budget. They do not always need to be perfect to the fraction of an inch for the first conversation, but they should include all important walls, openings, appliances, utilities, and obstacles.
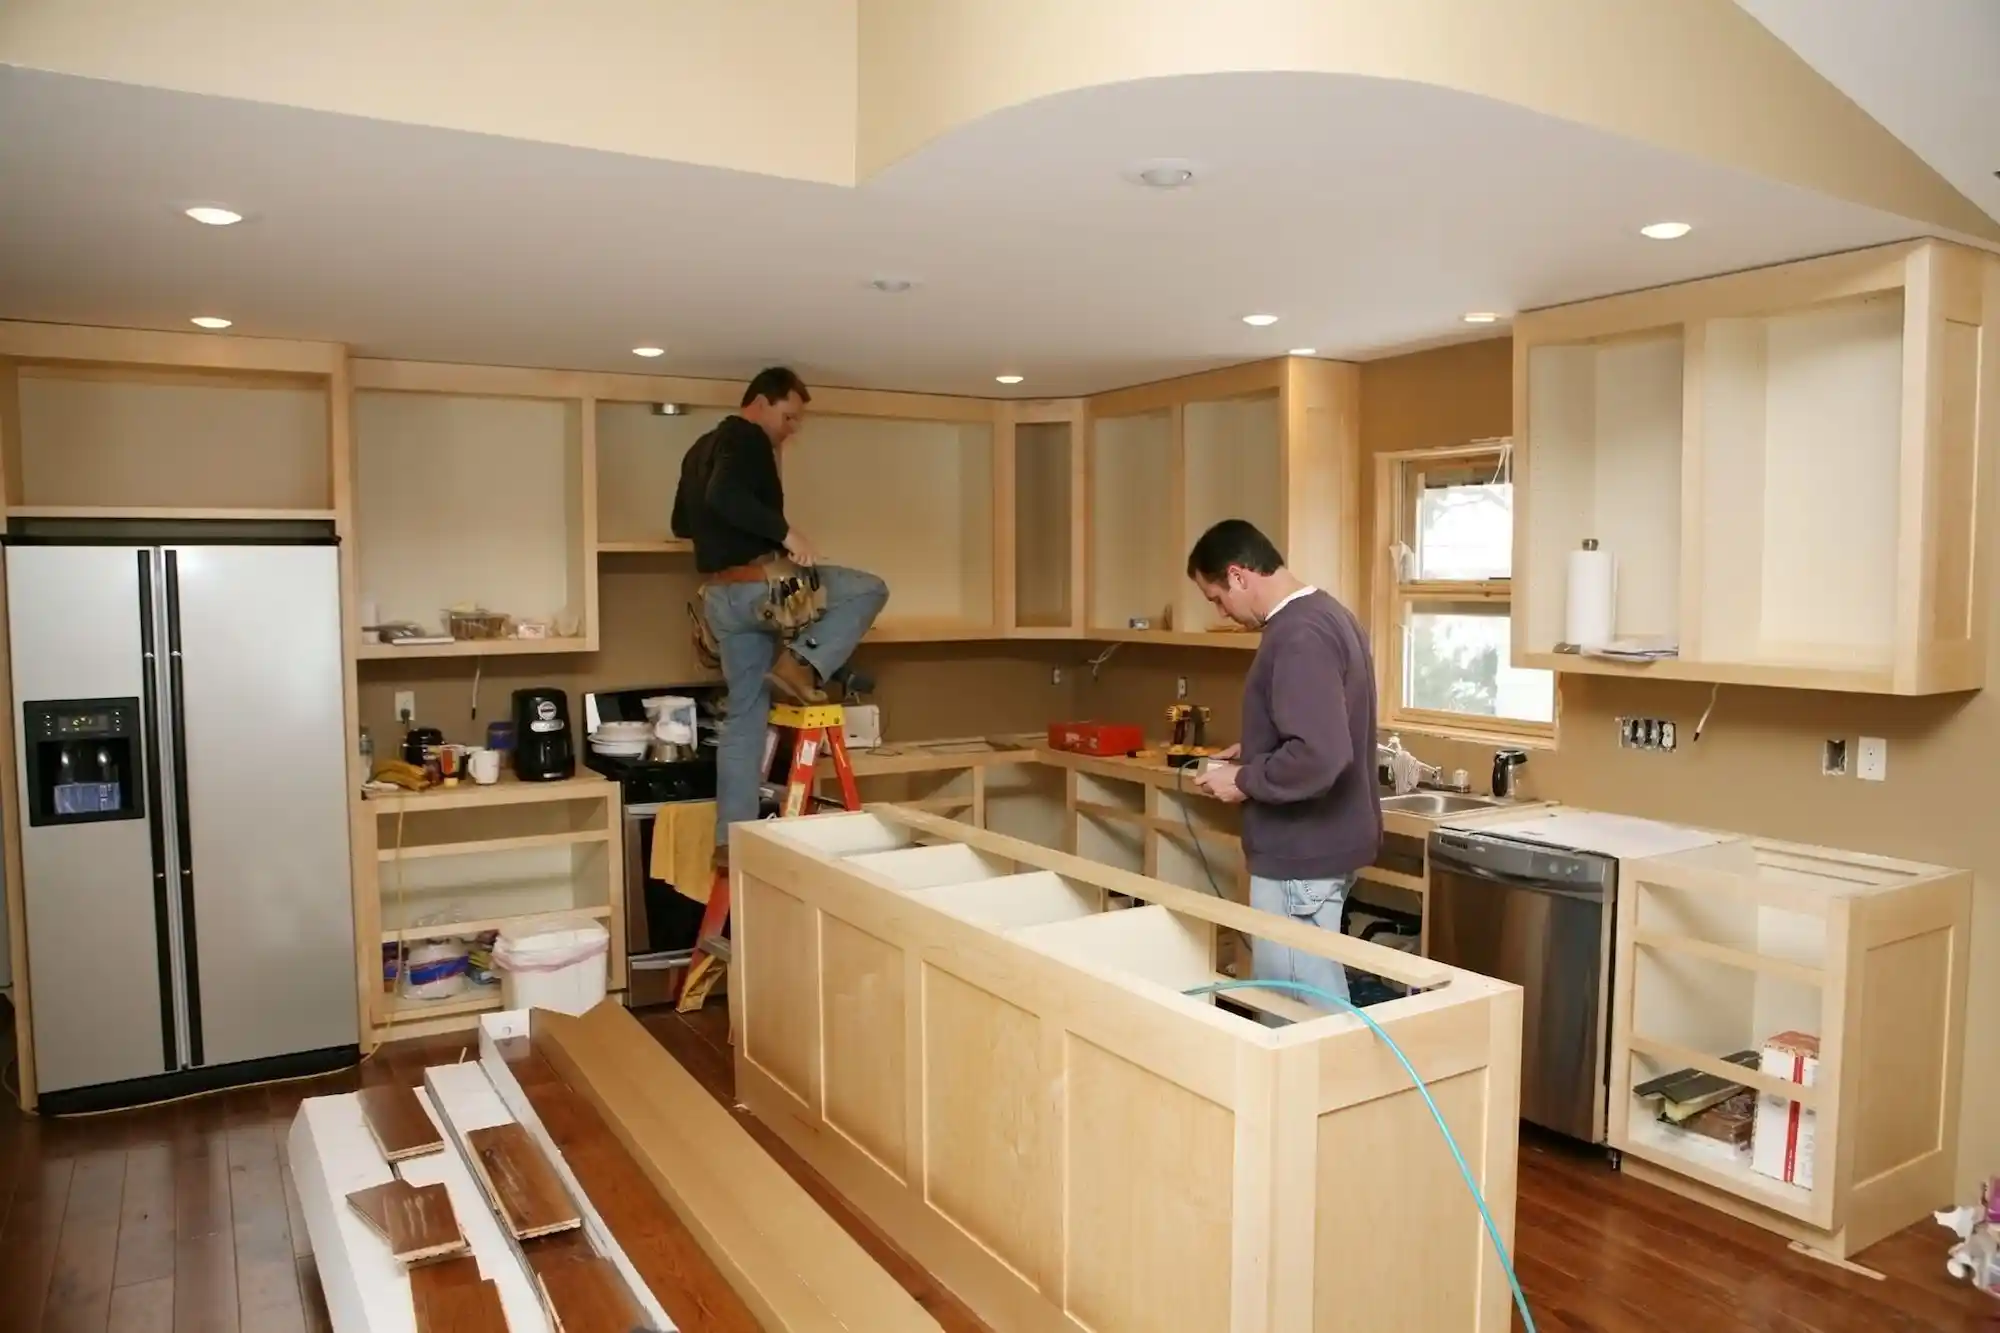
Before cabinets are ordered, critical dimensions should be confirmed. This is especially important for cabinetry that fits between fixed walls, tall cabinets near ceilings, appliance openings, and complex corner layouts. Manufacturer measurement guidance similarly treats homeowner measurements as the basis for design while emphasizing complete wall, appliance, and obstruction information. Those verified dimensions also guide the installer later, and our step-by-step guide on how to install kitchen cabinets shows how they are used to set level reference lines.
Kitchen Cabinet Measurement Checklist
Before sending measurements to a cabinet designer, review the sketch from start to finish and make sure another person could understand the room without being there. Every dimension should connect clearly to a wall, corner, opening, appliance, or fixed feature. Photos should show the same walls that appear on the sketch.
At Columbus Cabinets City, a complete preliminary measurement gives us a much stronger starting point when you request a free design and quote. The checklist below covers the information we would want to see before turning a rough kitchen sketch into a proposed layout.
Make sure you have recorded:
- Full wall lengths
- Floor-to-ceiling height
- Soffit dimensions
- Window width and height
- Window position on the wall
- Floor-to-window-sill height
- Door and opening widths
- Door swing direction
- Sink and plumbing location
- Electrical outlets and switches
- Gas connections
- Vent locations
- Refrigerator dimensions
- Range or cooktop dimensions
- Dishwasher dimensions
- Microwave or wall oven dimensions
- Columns, radiators, pipes, and other obstacles
- Existing cabinet dimensions if relevant
- Island location if planned
- Photos of every major wall
Measure Your Kitchen Before Choosing New Cabinets
Learning how to measure kitchen cabinets correctly gives you a much better starting point for design, pricing, and product selection. Measure the entire room first, then document windows, doors, ceiling height, appliances, utilities, obstructions, and existing cabinets where relevant. Keep your measurements in inches and clearly label every dimension so the kitchen can be understood from the drawing without relying on memory.
At Columbus Cabinets City, we can use your preliminary kitchen measurements and photos to begin comparing cabinet layouts, kitchen cabinet styles, storage options, and product choices for your Columbus-area project. Before the final cabinet order is placed, confirming critical field dimensions helps make sure the cabinetry, appliances, fillers, panels, and installation plan work together properly.
Frequently Asked Questions About Measuring Kitchen Cabinets
To measure a kitchen for new cabinets, start by drawing the room and measuring every cabinet wall from corner to corner. Record ceiling height, windows, doors, plumbing, electrical connections, appliances, soffits, and other obstacles. Use inches throughout the drawing and show where each feature sits in relation to a fixed corner.
If the existing layout will remain similar, you can also measure the outside width, height, and depth of the current cabinets. The room measurements should still be the main reference for the new kitchen design.
Measure the full kitchen rather than only the spaces where the existing cabinets are installed. Record horizontal wall dimensions, vertical ceiling dimensions, openings, utilities, appliance sizes, and fixed obstructions. Make sure doors and windows are located accurately along each wall.
Once the room is documented, the measurements can be used to build a cabinet layout using individual cabinet widths, fillers, panels, and appliance openings. Final critical dimensions should be verified before the cabinet order is submitted.
For cabinet replacement and kitchen design, measure existing cabinets from the outside edges because the exterior dimension tells us how much room the cabinet occupies. Measure width, height, and depth and identify the cabinet type.
Interior dimensions are more appropriate when you are purchasing organizers, trays, pull-outs, or other accessories that need to fit inside an existing cabinet. For a new cabinet layout, room dimensions and exterior cabinet measurements are more useful.
Measure the walls first. Existing cabinets may not use all available space and may include fillers or sizes that should not be repeated in the new design. Complete wall dimensions allow the designer to build the new kitchen around the actual room.
Existing cabinet measurements can still be helpful when you like the current layout or want to compare old and new storage. They should be treated as reference information rather than the only basis for ordering replacement cabinets.
Measure the length of each cabinet run in inches and add the relevant measurements together. Divide the total number of inches by 12 to convert the result into linear feet. For example, 216 inches of cabinet run equals 18 linear feet.
Use linear footage only for rough planning or price comparisons. The final kitchen design should be based on specific cabinet widths because appliances, corners, pantry units, fillers, and other components affect how the wall space is actually used.
Upper and lower cabinet runs should be recorded separately because they represent different cabinetry. A wall may have base cabinets, wall cabinets, tall cabinets, or a combination of all three, and a single linear-foot figure does not clearly describe what is being installed.
If a company provides pricing by linear foot, ask exactly what the figure includes. Some pricing methods use a standard combination of upper and lower cabinets, while others may calculate the runs separately.
Preliminary measurements should be as accurate as you can reasonably make them because they influence layout, appliance spacing, and early pricing. Record actual dimensions instead of rounding walls to the nearest foot or assuming standard sizes.
Critical measurements should be verified before ordering cabinets. This is especially important when cabinetry fits tightly between walls, surrounds appliances, reaches the ceiling, or uses complex corners where small dimensional errors can affect installation.
We recommend measuring kitchen cabinets and the room in inches. Cabinet sizes, appliance widths, fillers, panels, and design specifications are commonly expressed in inches, which makes the measurements easier to use during cabinet planning.
You can convert total cabinet runs into linear feet later for budgeting. Keep the original inch measurements on the drawing because those dimensions are what the designer will use to determine individual cabinet sizes.
Measure both walls that meet at the corner from their full corner-to-corner reference points and show the relationship clearly on your floor plan. Do not subtract an estimated corner cabinet size from either wall before the cabinet design is created.
Different corner cabinet types require different amounts of space. Once the cabinet line and corner solution are selected, the designer can determine how much of each wall the corner cabinet will occupy.
Measure the available open floor area after considering the perimeter cabinets and appliances. The island needs enough surrounding clearance for people to walk comfortably and for nearby cabinet drawers, dishwasher doors, refrigerator doors, and appliances to open.
If the island will include a sink, cooktop, seating, or electrical service, note these features during planning. The final island size should be determined as part of the complete kitchen layout rather than from the room center alone.
Yes. Homeowner measurements are usually enough to begin a kitchen design and get an early understanding of cabinet options. A tape measure, basic sketch, and clear photographs can provide a designer with a strong starting point when the walls, openings, appliances, and utilities are documented carefully.
Before the final cabinet order, we recommend confirming critical dimensions. Professional verification is especially valuable for complicated layouts, older homes, tight appliance openings, ceiling-height cabinetry, and kitchens where several cabinet runs meet between fixed walls.