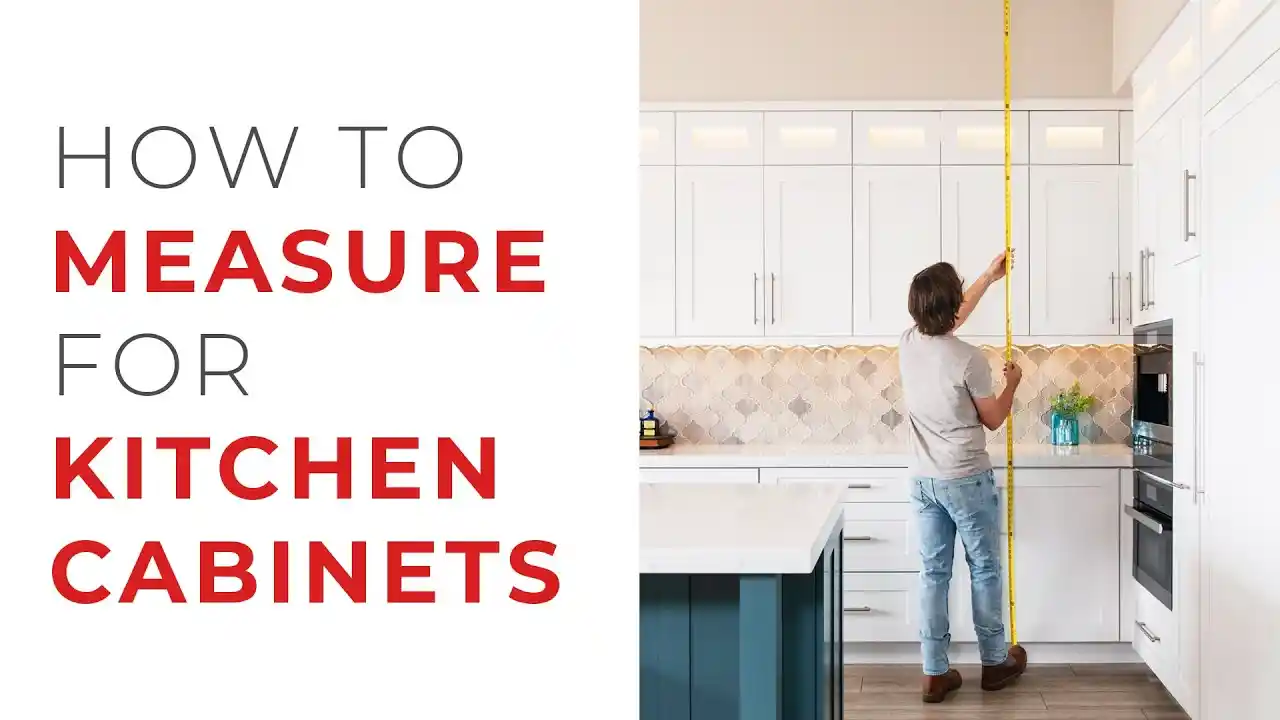
Installing kitchen cabinets takes careful measuring, accurate leveling, and patience. It starts long before the first box goes up, with knowing how to measure kitchen cabinets and the room correctly. The process itself is straightforward, but small mistakes can affect the entire cabinet run. Cabinets that are slightly out of level can create uneven door gaps, interfere with appliances, make countertop installation more difficult, and leave noticeable gaps between cabinets.
If you are learning how to install cabinets for the first time, the best approach is to work in a clear order. Prepare the room, inspect the cabinets, find the highest point of the floor, establish level reference lines, locate wall studs, install the wall cabinets, and then move on to the base cabinets and finishing details.
This guide explains how to install kitchen cabinets step by step, including wall cabinets, base cabinets, cabinet handles, trim, doors, drawers, and corner cabinets. It also covers common installation mistakes and explains when professional cabinet installation may be the better option.
What You Need Before Installing Kitchen Cabinets
Before installation begins, make sure your cabinets match the approved kitchen layout and that every major component is available. Check cabinet sizes, fillers, panels, doors, drawers, trim pieces, and mounting hardware before starting. You should also inspect the room carefully because kitchen floors, walls, and ceilings are not always level or square. Finding these conditions early makes it much easier to position cabinets correctly and avoid alignment problems later.
If your kitchen remodel includes plumbing, electrical work, appliance changes, flooring adjustments, or wall modifications, coordinate those items before the cabinets are permanently installed. Cabinet installation should begin only when the room is ready for the new cabinetry. Taking time to verify the layout, utilities, clearances, and cabinet condition before drilling or fastening anything can prevent unnecessary corrections later in the project.
Tools and Materials for Cabinet Installation
Having the right tools and materials makes kitchen cabinet installation easier, safer, and more accurate. You do not need a large collection of specialty tools for every installation, but reliable measuring, leveling, drilling, clamping, and fastening equipment is essential. The exact tools and hardware you need will depend on the cabinet construction, wall type, kitchen layout, and installation method recommended by the cabinet manufacturer.
Essential Tools
Common tools for installing kitchen cabinets include a tape measure, pencil, stud finder, carpenter’s level or laser level, drill and driver, suitable drill bits, clamps, straightedge, utility knife, and step ladder. A hole saw or jigsaw may also be needed when cabinets require openings for plumbing or other utilities. Safety glasses should be worn when drilling, cutting, or working with materials that may create dust or debris.
Installation Materials
Typical installation materials include cabinet screws, manufacturer-approved mounting hardware, wood shims, filler strips, toe kicks, crown molding, decorative panels, and cabinet handles or pulls. A temporary ledger board may also be useful when hanging conventional wall cabinets. Always check the installation instructions for your specific cabinet system because mounting locations, fasteners, rails, brackets, and connection methods can vary between manufacturers.
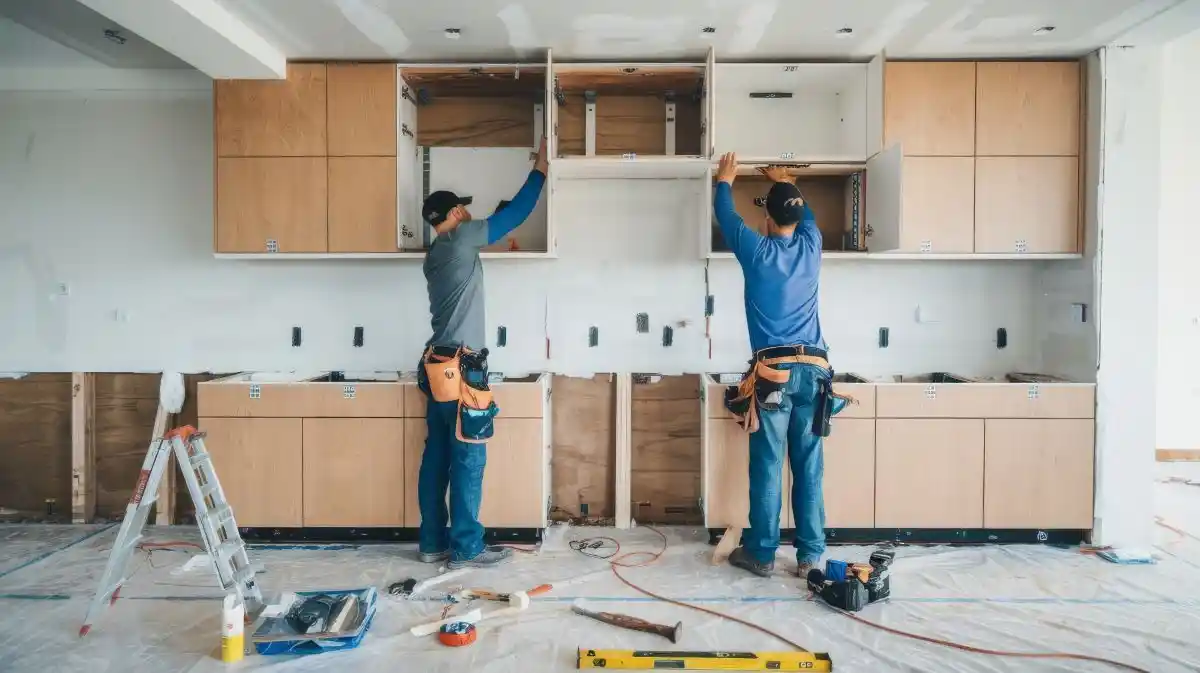
Inspect and Prepare Your New Cabinets
Inspect every cabinet before you begin installing it. Look for shipping damage, cracked components, missing hardware, incorrect sizes, damaged finishes, or doors and drawers that do not match the kitchen plan. It is much easier to resolve a cabinet problem before the box has been mounted to the wall. A complete inspection also confirms that your order matches the planned layout and that all necessary components are available.
Inspect Cabinets for Damage
Open each cabinet package carefully and inspect the finished surfaces, corners, face frames, doors, shelves, drawer components, and structural parts. Check for scratches, cracks, loose joints, or damage that may have occurred during shipping. Keep protective coverings on finished surfaces where possible until installation is complete, as this can help protect the cabinets from scratches while other boxes, tools, and trim pieces are being handled.
Confirm Cabinet Sizes and Layout
Compare each cabinet with the kitchen design before installation. Confirm cabinet width and height, corner cabinet locations, sink base position, appliance openings, filler requirements, finished end panels, and tall cabinet locations. Labeling cabinets according to their planned position can make installation easier and reduce the chance of placing a similar-looking cabinet in the wrong location.
Assemble RTA Cabinets Before Installation
If you are installing ready-to-assemble kitchen cabinets, assemble each box according to the manufacturer’s instructions before mounting it. Make sure the cabinet is square and that all structural fasteners are installed correctly. Do not assume that an incorrectly assembled cabinet will become square after it is mounted to the wall, as an out-of-square box can create door, drawer, and alignment problems.
Prepare the Kitchen for Cabinet Installation
Preparing the kitchen correctly can prevent many problems that otherwise appear during installation. Remove old cabinetry, loose trim, debris, and anything that interferes with measuring or cabinet placement. The work area should be clear enough to check the walls, floors, plumbing locations, appliance openings, and cabinet layout accurately. If other remodeling work is unfinished, make sure it will not require removing newly installed cabinets later.
Remove Existing Cabinets
Remove doors and drawers from the existing cabinets first to reduce the weight of the boxes and make them easier to handle. Carefully remove the cabinet boxes while trying to avoid unnecessary damage to walls that will remain. Appliances, plumbing fixtures, or electrical connections should only be disconnected when it is safe and appropriate to do so, and specialized work should be handled by qualified professionals when required.
Check Plumbing, Electrical, and Appliance Locations
Verify the location of sink plumbing, dishwasher connections, electrical outlets, range connections, refrigerator space, microwave openings, and range hood requirements before installing cabinets. Compare these locations with the new kitchen plan and appliance dimensions. Even a small error in an appliance opening can become difficult to correct once the surrounding cabinets have been fastened together and secured to the wall.
Confirm the Cabinet Layout on the Walls
Transfer the important parts of the cabinet layout onto the walls before installation. Mark cabinet edges, corners, appliance openings, fillers, and tall cabinet positions so you have a visible reference while working. This simple step allows you to compare the planned kitchen with the actual room and identify potential spacing or clearance problems before cabinets are lifted into position.
Check the Floor, Walls, and Ceiling for Uneven Areas
Kitchen surfaces are rarely perfectly level, flat, or square, especially in older homes. Before fastening any cabinets, inspect the floor, walls, and ceiling so you know where adjustments will be needed. The goal is not to make the cabinets follow every dip or bow in the room. Instead, cabinets should be installed level, plumb, and aligned while shims and finishing materials compensate for normal surface irregularities.
Find the Highest Point of the Floor
Use a long carpenter’s level or laser level to identify the highest point of the floor along the base cabinet run. This point is important because cabinets in lower areas can be raised with shims, while cabinets cannot easily be lowered below the highest part of the floor. Use the high point to establish a level reference for the top of the base cabinets throughout the kitchen.
Check Walls for Bumps and Uneven Areas
Place a long level or straightedge against the walls to identify bows, bumps, recessed areas, and other irregularities that could affect cabinet placement. Minor variations can usually be managed with properly positioned shims. Avoid forcing a rigid cabinet box tightly against an uneven wall with mounting screws because this can twist the cabinet and cause problems with doors, drawers, or neighboring cabinets.
Check Ceiling Height and Clearance
Measure the ceiling height at several locations, especially when wall cabinets, tall pantry cabinets, or crown molding will extend close to it. A ceiling can slope enough to create a noticeable difference across a long cabinet run even when the variation is difficult to see at first. Identifying the condition early allows you to plan crown molding, fillers, or scribe pieces that create a cleaner finished appearance.
Mark the Cabinet Installation Layout
Once the room has been checked, establish accurate reference lines for the base and wall cabinets. These marks act as guides throughout the installation and help keep the cabinets level even when floors or ceilings are uneven. Take measurements from the verified floor high point and approved kitchen plan rather than relying on visual judgment. Clearly marked layout lines also help confirm cabinet edges, appliance openings, filler positions, and wall stud locations.
Mark the Top of the Base Cabinets
Measure from the highest point of the floor and mark the planned height of the base cabinet tops. Standard kitchen base cabinets are commonly about 34 1/2 inches high before the countertop, but you should always work from the actual dimensions of your cabinetry and kitchen plan. Use a laser level or long level to extend this reference line across the full cabinet run.
Mark the Bottom of the Wall Cabinets
Mark the planned location of the bottom of the wall cabinets using the kitchen design and finished countertop height as references. Many kitchens have about 18 inches between the countertop and the bottom of standard upper cabinets, but appliance clearances, backsplash design, accessibility requirements, cabinet dimensions, and other project conditions can change that spacing. Follow your approved design instead of relying only on a standard measurement.
Locate and Mark Wall Studs
Use a stud finder to locate the wall framing before installing upper or base cabinets. Mark the center of each stud and extend the marks vertically so they remain visible after cabinets are moved against the wall. Knowing the stud locations in advance makes mounting easier and helps avoid unnecessary drilling. Be aware that electrical wiring, plumbing pipes, and other utilities may also be hidden inside the wall.
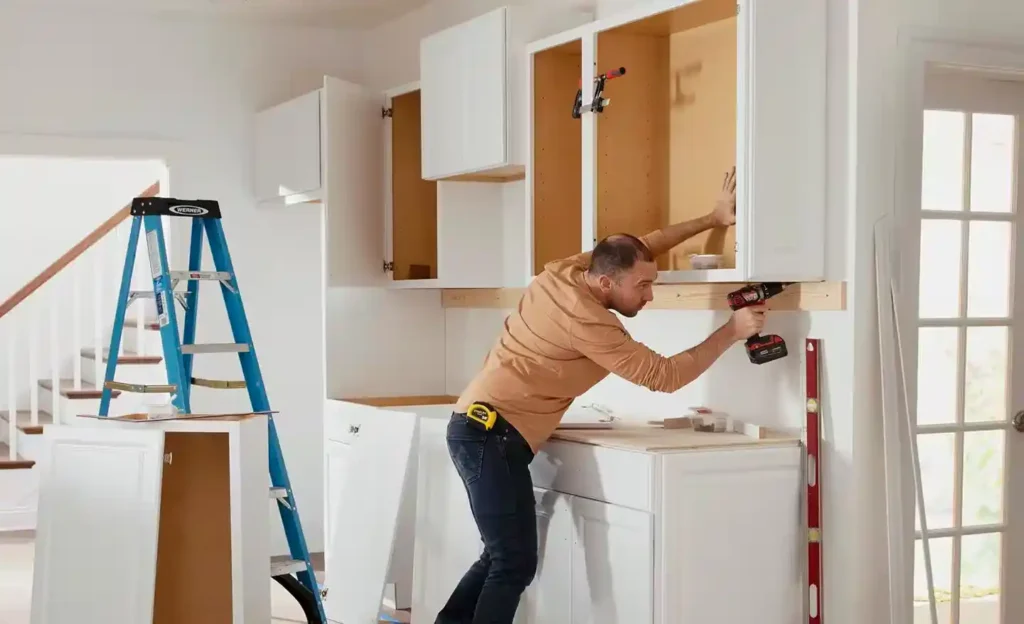
Should You Install Wall or Base Cabinets First?
In most conventional kitchen installations, wall cabinets are installed before base cabinets because this provides more open working space. You can stand closer to the wall, position a ladder more easily, use a temporary ledger board, and lift upper cabinets without reaching over lower cabinetry. Installing the wall cabinets first also reduces the chance of scratching or damaging new base cabinets while drilling and working above them.
Some cabinet systems, custom layouts, or project conditions may require a different sequence. For this reason, the manufacturer’s instructions and approved kitchen plan should always take priority over a general installation rule. If the kitchen includes tall cabinets, integrated appliances, specialty mounting rails, or other custom elements, review the entire installation sequence before permanently fastening the first cabinet.
How to Install Wall Cabinets
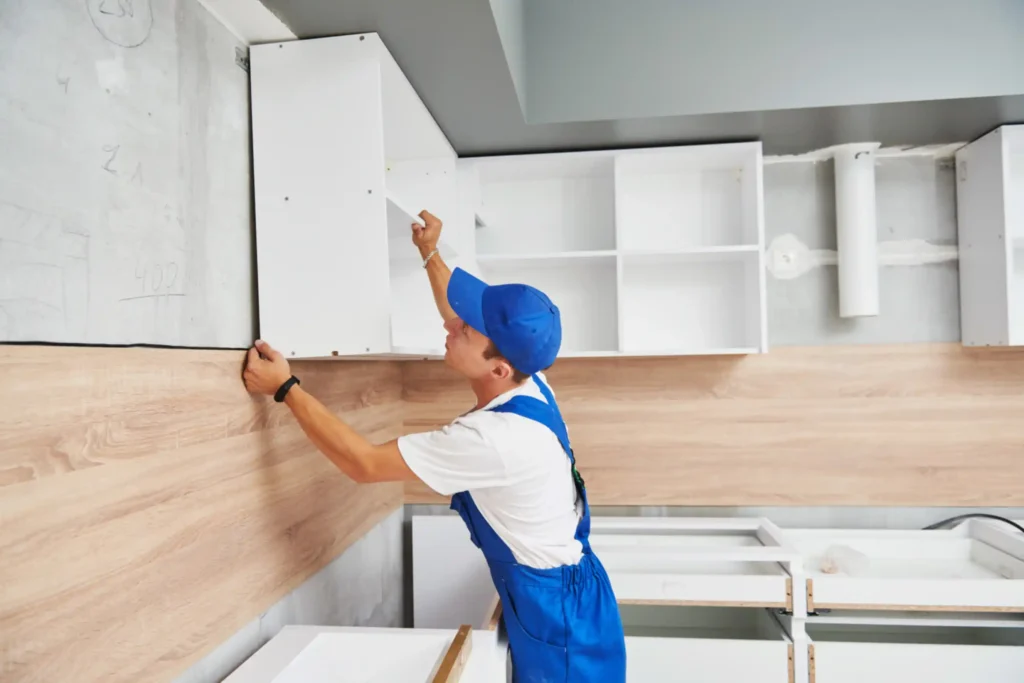
Learning how to install wall cabinets correctly is one of the most important parts of kitchen cabinet installation. Upper cabinets must be positioned at the proper height, kept level and plumb, aligned with neighboring boxes, and securely mounted using the correct structural fastening method. Small errors in the first cabinet can become more noticeable across the cabinet run, so spend extra time positioning the starting cabinet accurately.
When practical, remove adjustable shelves and cabinet doors before lifting an upper cabinet. Reducing the weight makes the box easier to position and can make the installation safer. Label each component so it can be returned to the correct cabinet afterward. Larger wall cabinets can be difficult to lift and hold in position, so another capable person or suitable cabinet lifting equipment may be necessary.
Set Up a Temporary Ledger Board
A temporary ledger board can support the bottom of conventional wall cabinets while they are positioned and secured. Install a straight board along the level reference line that marks the bottom of the wall cabinets, then verify it with a level before placing cabinets on it. If your cabinet system uses mounting rails, brackets, or another support method, follow the manufacturer’s instructions instead of using a ledger.
Choose the Correct Cabinet Mounting Hardware
Use cabinet mounting hardware that is suitable for the cabinet construction, wall structure, and manufacturer’s installation method. Do not assume that ordinary drywall or general-purpose screws are appropriate for hanging wall cabinets. Fasteners should pass through the structural mounting areas of the cabinet and into the approved wall support specified by the cabinet manufacturer.
Start With the Corner Wall Cabinet
If the kitchen includes a corner cabinet, the installation commonly begins at the corner so the cabinet runs on both walls can be positioned correctly. Lift the cabinet into place and check that it is level from side to side, plumb vertically, correctly positioned within the layout, and aligned with the reference line. The accuracy of this first cabinet will influence the cabinets installed beside it.
Level and Shim the First Cabinet
If the wall surface is uneven, insert shims behind the cabinet at appropriate support points until the box is level and plumb. Shimming allows the cabinet to remain straight without being pulled into the shape of an irregular wall. Check the cabinet again after placing the shims because even a small adjustment at one mounting point can affect the position of the entire box.
Secure the Cabinet to the Wall
Fasten the wall cabinet through the structural mounting areas using the hardware specified for your cabinet system. Partially tighten the fasteners first so you can still make minor adjustments. Recheck the cabinet for level, plumb, and correct placement before fully tightening the mounting hardware. Avoid overtightening fasteners, as excessive force can distort the cabinet or pull it away from its proper alignment.
Clamp and Connect Adjacent Cabinets
Position the next cabinet beside the first and bring the visible front edges or face frames into alignment. Use clamps where appropriate to keep the cabinets flush while the connecting screws are installed. Do not use connecting screws to force badly misaligned cabinets together. If the faces do not line up naturally, correct the cabinet’s position, level, or shimming before joining the boxes.
Install the Remaining Wall Cabinets
Continue installing the remaining wall cabinets one box at a time. Position each cabinet, check level and plumb, add shims where required, align the front with the neighboring cabinet, connect the boxes, and secure the new cabinet to the wall. Recheck the complete cabinet run regularly so that small differences are corrected before they become noticeable across several cabinets.
How to Hang Wall Cabinets So They Stay Level
If you are wondering how to hang wall cabinets so they stay straight, the most important step is establishing a reliable level reference before installing the first cabinet. Do not use the ceiling as your main leveling guide because ceilings can slope or vary in height. Work from a true level line, position the first cabinet carefully, and use shims wherever wall irregularities would otherwise push the cabinet out of position.
Check each wall cabinet individually and compare it with the boxes already installed. Neighboring cabinet faces should be aligned before the cabinets are connected, and the complete run should be checked regularly rather than only at the end. Keep the first cabinet level and plumb, support uneven areas with shims, and avoid using mounting screws to force a cabinet against an irregular wall.
How Do You Install Base Cabinets?
Base cabinets form the foundation for countertops, sinks, and many kitchen appliances, so accurate installation is essential. The top of the completed cabinet run should create a consistent, level surface that can properly support the countertop. If one cabinet is too high, too low, or out of plumb, the problem can affect neighboring cabinets and create difficulties when countertops, appliances, or decorative panels are installed.
Begin at the starting point shown on the approved kitchen layout, which may be a corner cabinet or an end cabinet depending on the design. Use the floor high point and level reference line established earlier. Position each box carefully, shim uneven surfaces, and avoid permanently fastening the cabinet until you have checked its height, level, plumb, and relationship to neighboring cabinets.
Start at the Highest Point of the Floor
Use the previously identified floor high point as the reference for the base cabinet installation. Cabinets positioned over lower areas can be raised with shims until their tops match the level line. Starting from the correct reference prevents the cabinet run from gradually changing height and helps create a level surface for the countertop across the entire kitchen.
Position and Level the First Base Cabinet
Place the first base cabinet in its planned location and compare it with the layout marks on the wall. Check the cabinet from side to side and front to back with a level, then confirm that the box is plumb vertically. Adjust its position and add support where necessary before attaching it to the wall because the first cabinet establishes the reference for the cabinets beside it.
Shim Uneven Areas
Insert shims beneath low areas of the cabinet until the box reaches the correct height and remains level. You may also need shims between the back of the cabinet and an uneven wall. Position the shims where they provide solid support rather than simply filling visible gaps. After the cabinet is secured, protruding shim material can be carefully trimmed without disturbing the cabinet position.
Secure the Cabinet to the Wall
Once the base cabinet is level, plumb, and correctly positioned, secure it through the approved structural mounting points using suitable fasteners. Tighten the screws carefully so the cabinet remains against the reference line without being pulled out of alignment. Check the cabinet again after fastening because an uneven wall or overtightened screw can change its position.
Attach Base Cabinets Together
Move the next base cabinet into position and align its front face and top edge with the cabinet already installed. Clamp the boxes where appropriate before installing connecting screws. The cabinets should be independently leveled and positioned before they are joined, as connecting screws should hold properly aligned cabinets together rather than being used to correct differences in height or position.
Install the Remaining Base Cabinets
Continue across the cabinet run using the same sequence for each box: position, level, shim, align, connect, and secure. Check the top of the full cabinet run frequently with a long level or laser reference. Maintaining consistent alignment as you work is easier than trying to correct several interconnected cabinets after all of them have been permanently fastened.
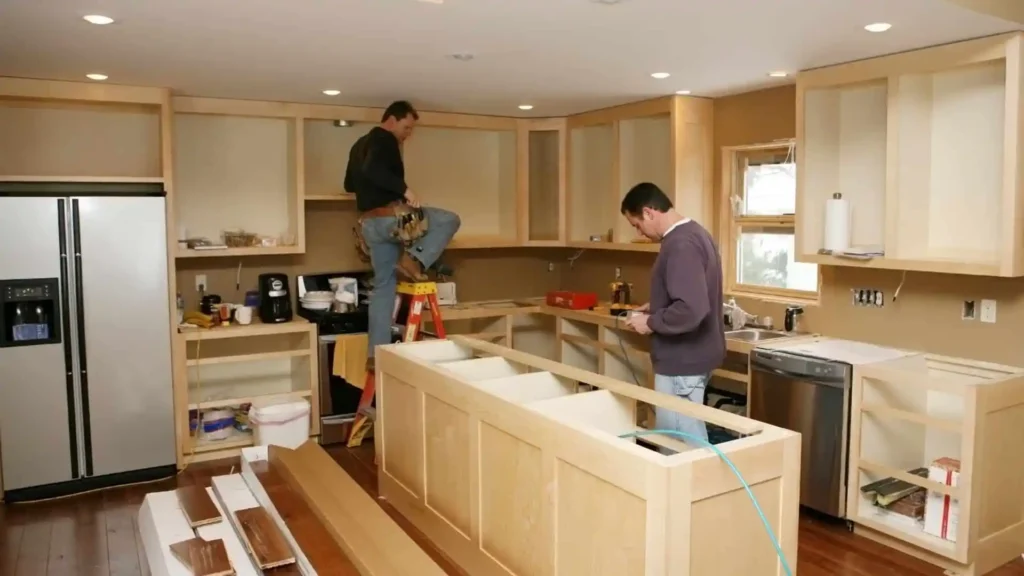
How to Install Base Cabinets Around Plumbing
Sink base cabinets often require openings for water supply lines, drain pipes, or other plumbing connections. Measure these locations carefully before cutting the cabinet and transfer the measurements from the wall or floor using more than one reference point. Double-check the marks before making any openings, as accurate cuts create a cleaner installation and avoid removing more cabinet material than necessary.
Use an appropriately sized hole saw, jigsaw, or other suitable cutting tool to create the openings needed for the plumbing. Avoid making oversized holes simply to compensate for uncertain measurements. If water lines, drain pipes, or other plumbing components need to be relocated rather than simply passed through the cabinet, complete those modifications before permanently securing the cabinet and use qualified professional help where appropriate.
How to Install a Lazy Susan Corner Cabinet
A Lazy Susan corner cabinet requires careful positioning because its location affects the cabinet runs extending from both sides of the corner. Place the cabinet according to the approved kitchen layout and verify the required clearances for neighboring doors, drawers, fillers, and appliances. Corner cabinet dimensions and mechanisms can vary, so follow the specific manufacturer’s instructions rather than assuming every Lazy Susan cabinet installs in the same way.
Once the cabinet is positioned, check that it is level and plumb before securing it. Open the doors and rotate the internal storage mechanism to make sure it operates freely without contacting surrounding cabinetry. Confirm any required filler dimensions and door clearances before adjoining cabinets are permanently installed because moving a corner cabinet later can affect both cabinet runs.
How to Attach Kitchen Cabinets Together
Connecting neighboring kitchen cabinets helps create a straight, continuous cabinet run, but the boxes should already be positioned correctly before they are joined. The joining method differs between framed vs frameless cabinets, since face frames and box edges connect in different ways. Align the visible cabinet faces or front edges and use clamps where appropriate to hold them flush. For face-frame cabinets, connecting screws are commonly installed through the adjoining frames, while frameless cabinet systems may specify different connection points.
Do not use connecting screws as a way to pull poorly aligned cabinets together. Level, shim, and position each box first so the cabinets naturally meet in the correct position. After the connection is complete, recheck the cabinet tops, front edges, and door openings to make sure neither cabinet moved while the fasteners were being installed.
How to Adjust Cabinet Doors and Drawers
After the cabinet boxes are installed, reinstall the doors, drawers, and adjustable shelves and inspect the spacing between visible components. Small alignment differences are common and can often be corrected using the adjustment features built into modern hinges and drawer systems. Before making major hardware adjustments, verify that the cabinet boxes themselves are still level, plumb, and properly aligned.
Make small adjustments and compare each door or drawer with the surrounding cabinetry as you work. The goal is to achieve even gaps, consistent heights, and smooth operation across the complete kitchen. If several doors or drawer fronts are misaligned in the same direction, check the cabinet installation before attempting to correct every component individually.
Adjust Cabinet Hinges
Many concealed hinges allow you to change the height, side-to-side position, or depth of a cabinet door. Identify the adjustment screws for your specific hinge and make small changes while checking the gap around the door. Avoid making large adjustments all at once because correcting one edge can affect the alignment of another part of the door.
Align Cabinet Doors
Stand back from the installed cabinetry and compare the height and spacing of neighboring doors. Look for consistent vertical and horizontal gaps and make small hinge adjustments where necessary. If a door cannot be aligned properly even after reasonable adjustment, check whether the cabinet itself is square and whether adjoining boxes remain level before assuming there is a problem with the door.
Adjust Drawer Fronts and Slides
Open and close each drawer to make sure it moves smoothly and sits correctly when closed. Depending on the drawer system, you may be able to adjust the front vertically, horizontally, or by changing its tilt. Follow the hardware manufacturer’s instructions and make small changes until the drawer fronts line up evenly with neighboring drawers and cabinet doors.
How to Install Cabinet Handles and Pulls
Installing cabinet handles and pulls is one of the final steps, but it requires careful measuring because a misplaced hole can permanently damage a finished door or drawer front. Choose the hardware position before drilling and test the location on one cabinet first. A cabinet hardware template or drilling jig is particularly helpful because it allows the same measurements to be repeated accurately throughout the kitchen.
Hardware placement depends on the cabinet style, door profile, drawer size, pull design, and user preference, so there is no single location that works for every kitchen. Focus on comfortable use and consistent visual alignment. Once the first handle or pull has been positioned correctly, use the same reference measurements or template settings for comparable doors and drawers.
Decide Where Cabinet Handles Should Go
Choose a hardware position that works with the cabinet door or drawer design and feels natural to use. Door handles and knobs are generally installed near the opening edge rather than the hinge side, while drawer pulls are often centered across the drawer front. Before drilling, hold or temporarily position the hardware on the cabinet and evaluate how it looks from a normal viewing distance.
Use a Cabinet Hardware Template
A cabinet hardware template or drilling jig helps repeat the same hole locations across similar doors and drawers. This is especially helpful when installing pulls that require two mounting holes with a specific center-to-center measurement. Set the template carefully for the first cabinet and confirm the placement before using the same setting throughout the rest of the installation.
Measure and Mark the Drill Holes
Measure the hardware location carefully and mark the drilling points lightly with a pencil. For two-hole pulls, verify the manufacturer’s center-to-center spacing and compare it with the drilling template before making any holes. Check the measurements from the cabinet edge as well as the top or bottom reference point so that the hardware remains consistent across multiple doors and drawer fronts.
Drill and Install Handles or Pulls
Drill straight through each marked point using a bit sized appropriately for the hardware screws. Supporting the back of the drilling area with scrap wood may help reduce tear-out on some cabinet materials. Insert the mounting screws from the back of the door or drawer front, attach the handle or pull, and tighten it until secure without applying enough force to damage the cabinet surface.
How to Avoid Uneven Cabinet Hardware
Install one handle or pull before drilling the remaining cabinets and step back to evaluate its position. Make sure the height, spacing, and distance from the cabinet edge look balanced and feel comfortable during use. Once the placement is confirmed, repeat the same measurements using a template or jig instead of independently measuring every door and drawer, which can introduce small but noticeable differences.
Install Crown Molding, Toe Kicks, and Finishing Trim
Once the cabinet boxes are level, secure, and properly aligned, you can install the finishing components that complete the kitchen. Crown molding, toe kicks, filler strips, scribe molding, finished panels, and decorative trim can create a more built-in appearance while covering intentional gaps between cabinetry and surrounding surfaces. Complete these details only after the primary cabinet installation has been checked carefully.
Measure finishing pieces according to the actual conditions in the room rather than assuming the walls, floors, or ceilings are perfectly straight. Trim often needs to compensate for small variations around the cabinet run. If a cabinet is still out of position, correct it before attaching decorative pieces because adjusting the cabinet afterward may require removing newly installed molding or panels.
Install Crown Molding
Crown molding can create a finished transition between wall cabinets and the ceiling or add decorative detail above cabinetry that stops below the ceiling. Measure each section carefully and plan inside corners, outside corners, and joints before cutting the molding. If the ceiling is uneven, the molding may require scribing or additional trim adjustments so the finished installation looks consistent without pulling the cabinets out of level.
Install Toe Kicks
Toe kicks cover the recessed area along the bottom of installed base cabinets and create a continuous finished surface near the floor. Measure each section after the base cabinet run is fully secured, then cut the toe kick material to fit the actual opening. Check floor variations as you work because sections may require small adjustments to sit neatly against an uneven floor without creating noticeable gaps.
Install Filler Strips and Scribe Molding
Fillers may be required between cabinets and walls, appliances, or neighboring cabinet runs. They provide clearance for doors and handles while also helping compensate for uneven walls. Do not remove planned filler space simply because a cabinet appears capable of moving closer to the wall, as doing so can interfere with cabinet operation and create alignment problems.
Add Decorative Panels and Finishing Pieces
Decorative end panels, light rail, finished skins, and other trim pieces should be installed after the main cabinet boxes are secure and properly aligned. Measure every panel against the actual cabinet and surrounding surface before cutting or fastening it. These finishing pieces should complement the cabinet layout and cover exposed areas cleanly without interfering with doors, drawers, appliances, or planned countertop installation.
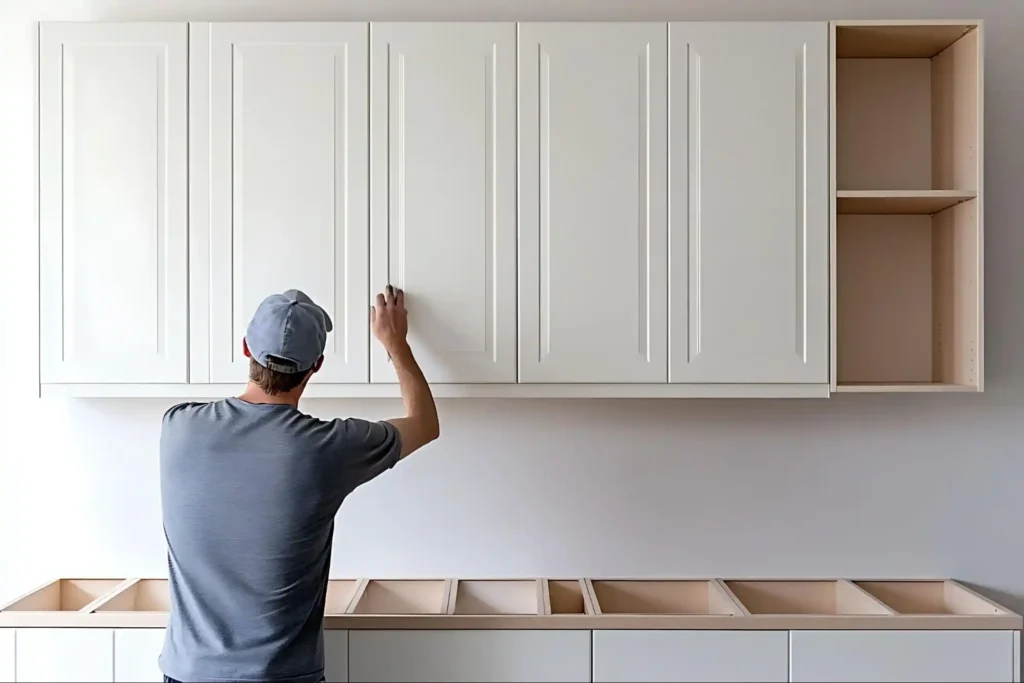
How to Install a Recessed Medicine Cabinet
A recessed medicine cabinet is installed partly or completely inside a wall opening rather than sitting entirely on the wall surface. Although the basic process involves creating a rough opening, preparing the framing, positioning the cabinet, and securing it, the exact dimensions and mounting requirements vary by model. Always use the installation instructions supplied with the medicine cabinet before cutting into the wall.
The most important preparation step is determining what is inside the wall cavity. Electrical wiring, plumbing, vent lines, HVAC components, and structural framing can all affect where a recessed cabinet can be installed. Do not remove studs or make significant framing changes without understanding the wall construction. If utilities or structural components interfere with the planned opening, professional assistance may be necessary.
Check for Plumbing, Wiring, and Wall Studs
Inspect the planned installation area before creating the wall opening. Use appropriate methods to identify studs and consider where electrical wiring, water pipes, drain lines, ventilation components, or other hidden utilities may be located. Finding an obstruction after cutting a large opening can significantly complicate the project, so investigate the wall cavity as carefully as possible before committing to the cabinet location.
Mark the Required Rough Opening
Use the medicine cabinet manufacturer’s specified rough-opening dimensions rather than measuring only the outside dimensions of the cabinet. Mark the opening carefully and use a level to confirm that the layout is square, level, and plumb. Accurate marking gives the cabinet enough room to fit correctly while avoiding an oversized opening that would require unnecessary repair or additional finishing work.
Prepare the Wall Framing
After opening the wall, inspect the existing framing and add any support required by the manufacturer’s instructions. The medicine cabinet should have solid framing or other approved mounting support wherever its fasteners will be installed. Avoid cutting structural components unless the modification has been properly evaluated, as wall framing may need additional headers or blocking around the new opening.
Level and Secure the Medicine Cabinet
Place the medicine cabinet inside the prepared opening and check its depth, level, and plumb before securing it. Adjust the position until the cabinet sits evenly relative to the finished wall, then install the recommended fasteners through the approved mounting points. Complete the installation by adding shelves, doors, trim, lighting, or other included components according to the manufacturer’s instructions.
Common Kitchen Cabinet Installation Mistakes
Most cabinet installation problems begin with rushed preparation, inaccurate measurements, or skipped alignment checks rather than the final fastening step. A small error in the first cabinet can affect the entire run, so it is better to slow down and verify the layout, level, shimming, appliance clearances, and cabinet position throughout the project. Rechecking your work is usually easier than correcting several connected cabinets later.
Common DIY mistakes include assuming the floor is level, using a sloped ceiling as a reference, tightening mounting screws too soon, ignoring hidden utilities, forcing cabinets against uneven walls, and drilling cabinet hardware without checking the placement first. Avoiding these mistakes can improve both the appearance and function of the finished kitchen while reducing the risk of damaging new cabinetry.
Starting Without a Complete Layout
Confirm cabinet sizes, appliance openings, fillers, sink locations, and corner spacing before installation begins. Compare the kitchen design with the actual room dimensions, including walls, windows, doors, and utility locations. Mark cabinet positions on the wall before lifting any boxes into place so you can identify spacing or clearance issues while they are still easy to correct.
Assuming the Floor Is Level
Always identify the highest point of the floor and establish a level reference instead of measuring every cabinet from the floor independently. Floors can slope or contain low areas that are difficult to notice visually. Using the correct high point allows lower sections to be adjusted with shims and helps keep the top of the base cabinet run level for countertop installation.
Following the Ceiling Instead of a Level Line
A ceiling may slope even when the variation is difficult to see, so wall cabinets should not simply follow the ceiling line. Establish a true level reference for the cabinet bottoms and use trim, fillers, or scribe pieces to manage variations above the cabinets. Keeping the cabinetry level is more important than maintaining an identical gap beneath an uneven ceiling.
Skipping Wall Stud Checks
Locate wall framing and approved mounting points before lifting cabinets into place. Wall cabinets become significantly heavier after shelves, dishes, and other stored items are added, so secure structural attachment is essential. Mark stud centers clearly and verify that the mounting screws will pass through the structural portion of the cabinet according to the manufacturer’s installation requirements.
Ignoring Hidden Utilities
Be cautious when drilling or cutting into walls because electrical wiring, water lines, drain pipes, gas lines, and ventilation components may be hidden behind the finished surface. Consider likely utility routes and investigate uncertain areas before drilling deeply. If you are not confident that an area is clear, additional inspection or professional assistance is safer than risking damage to a concealed utility.
Tightening Screws Too Early
Partially tighten mounting screws until neighboring cabinets have been positioned and aligned. Fully securing every cabinet immediately can make it difficult to correct small differences in height, plumb, or face alignment. Once the cabinet run has been checked and the boxes are correctly positioned, tighten the fasteners securely without applying enough force to pull the cabinetry out of square.
Pulling Cabinets Against Uneven Walls
Use properly positioned shims to accommodate irregular walls rather than relying on mounting screws to force a cabinet against the surface. Pulling a rigid cabinet box against a bowed wall can distort the cabinet and lead to uneven doors or drawers. Shim behind appropriate mounting points so the cabinet remains level and plumb even when the wall itself is not perfectly straight.
Failing to Align Cabinet Faces
Cabinets can be individually level and still look poorly installed when their visible front edges do not line up. Before connecting neighboring boxes, align the face frames or front edges and hold them together with clamps where appropriate. Correct height or position problems with shims and adjustments first instead of using connecting screws to pull the faces into place.
Drilling Handles Without Testing Placement
Never drill all of the cabinet hardware holes before checking the placement on at least one door or drawer. A hole in a finished cabinet front is difficult to correct if the hardware appears too high, low, or close to an edge. Use a template, install one sample handle, evaluate the appearance, and then repeat the confirmed measurements throughout the kitchen.
Ignoring Manufacturer Instructions
General cabinet installation guidance should always be used alongside the instructions provided for your specific cabinets. Manufacturers may require particular screws, mounting rails, cabinet connection points, hinge adjustments, fillers, or trim methods. Following the product-specific instructions is important for safe mounting and proper operation, especially when your cabinet construction differs from a conventional face-frame installation.
Can You Install Kitchen Cabinets Yourself?
Kitchen cabinet installation can be a realistic DIY project for homeowners who are comfortable with accurate measuring, drilling, leveling, shimming, lifting, and basic carpentry work. A simple straight cabinet run is generally easier to manage than a kitchen with complex corners, tall pantry cabinets, integrated appliances, detailed crown molding, or significant wall and floor irregularities.
The difficulty increases when installing wall cabinets because they need to be lifted, supported, leveled, and securely mounted while remaining in the correct position. If you are uncertain about the cabinet layout, structural mounting method, plumbing, electrical work, or wall modifications, professional installation may be a safer and more efficient option.
When to Hire a Professional Cabinet Installer
Professional cabinet installation can make sense when the cabinetry is expensive, the kitchen layout is complex, or the project includes details that leave little room for error. Custom cabinetry, tall pantry units, integrated appliances, difficult corners, detailed crown molding, and uneven walls or floors may require more precise fitting and adjustment than a straightforward cabinet replacement.
Professional help is also worth considering when cabinet installation overlaps with plumbing, electrical work, or structural modifications. Even high-quality cabinets can look poorly finished if the boxes are not level, fillers are miscut, doors are uneven, or appliance openings are incorrect. Homeowners in Columbus, Ohio, can work with Columbus Cabinets City for kitchen cabinetry, design assistance, and professional cabinet installation.
How Much Does Cabinet Installation Cost?
Cabinet installation cost depends on the size of the kitchen, number of cabinets, cabinet construction, layout complexity, and amount of finishing work required. Installing a straightforward run of standard base and wall cabinets will generally require less labor than a kitchen with tall cabinets, difficult corners, custom fillers, appliance panels, crown molding, or other detailed finish work.
Additional project requirements can also affect installation pricing, including old cabinet removal, plumbing or electrical modifications, wall repairs, floor corrections, appliance fitting, and custom trim work. Because every kitchen has different dimensions and site conditions, a project-specific estimate is more useful than relying on a broad average that may not reflect the actual cabinet layout or installation requirements.
Important factors that can affect cabinet installation cost include the number of cabinets, kitchen size, wall and base cabinet configuration, custom fitting, demolition, molding and trim, appliance panels, plumbing changes, electrical work, floor or wall corrections, and local labor requirements.
Final Cabinet Installation Checklist
Before considering the project complete, inspect the entire kitchen rather than checking each cabinet only once. Confirm that the wall cabinets are securely mounted, base cabinet tops form a level surface, neighboring cabinet faces line up, and every door and drawer operates correctly. This final inspection is also the right time to check appliance openings, fillers, trim, toe kicks, plumbing openings, and cabinet hardware.
Small finishing adjustments can make a noticeable difference in the final appearance, so do not rush this stage. Correct uneven door gaps, adjust drawer fronts, tighten loose hardware, trim exposed shims, and check decorative pieces before considering the installation finished. A careful final inspection helps ensure that the cabinets look consistent and are ready for countertops, appliances, and everyday use.
Before finishing the project, confirm that the wall cabinets are level and plumb, base cabinet tops are level, all cabinets are securely mounted, neighboring faces are aligned, doors and drawers operate smoothly, hardware is evenly positioned, appliance openings are correct, fillers provide proper clearance, toe kicks and molding are complete, and finished cabinet surfaces remain clean and undamaged.
Get Help With Kitchen Cabinet Installation
Learning how to install kitchen cabinets comes down to careful preparation, accurate measuring, proper leveling, secure mounting, and repeated alignment checks. Take extra care with the first wall cabinet and first base cabinet because they establish the position of the cabinets that follow. Working carefully at the beginning can prevent crooked cabinet runs, uneven doors, poor countertop support, and finishing problems later.
If you are planning a new kitchen and would rather leave the measuring, fitting, leveling, and final adjustments to experienced installers, Columbus Cabinets City can help with kitchen cabinetry, design, and professional cabinet installation in Columbus, Ohio. Professional installation can be especially useful for complex layouts, high-value cabinets, integrated appliances, difficult site conditions, or projects that require detailed trim and precise fitting.
Frequently Asked Questions About Cabinet Installation
Where Do You Start When Installing Kitchen Cabinets?
Start by inspecting the new cabinets and confirming that the kitchen layout matches the actual room. Locate the highest point of the floor, establish level reference lines for the base and wall cabinets, identify wall studs, and verify appliance and plumbing locations. Completing these preparation steps before fastening cabinets helps prevent layout and alignment problems later.
Are Wall or Base Cabinets Installed First?
Wall cabinets are commonly installed before base cabinets because this leaves more open working space beneath them. Without lower cabinets in the way, it is easier to position ladders, use a ledger board, lift upper cabinets, and work close to the wall. Some specialized cabinet systems may require a different sequence, so follow the manufacturer’s instructions when necessary.
How Do You Hang Wall Cabinets?
Begin by marking a true level line and identifying the approved wall mounting points. Support the cabinet with a ledger board, mounting system, or appropriate lifting method, then position it level and plumb. Add shims where necessary to compensate for uneven walls and secure the cabinet using the hardware and structural mounting method specified by the manufacturer.
How Do You Install Base Cabinets?
Start at the appropriate point in the kitchen layout and use the floor high point as your height reference. Position the first cabinet, level it from side to side and front to back, add shims where necessary, and secure it after confirming the alignment. Install neighboring cabinets one at a time while keeping their tops and visible faces properly aligned.
Do Cabinets Need to Be Attached to Wall Studs?
Many conventional kitchen cabinet systems are designed to be attached through structural mounting rails or cabinet components into wall framing. Other systems may use specialized mounting rails or hardware. The correct method depends on the cabinet construction and wall type, so always follow the manufacturer’s requirements rather than relying on general-purpose drywall anchors.
Can You Install Cabinets on an Uneven Floor?
Minor floor variations can usually be managed by establishing a level reference from the highest point of the floor and placing shims beneath cabinets in lower areas. This allows the cabinet tops to remain level even when the floor is not. Significant floor damage, movement, or extreme unevenness may need to be corrected before cabinet installation begins.
How Long Does It Take to Install Kitchen Cabinets?
Installation time varies depending on the number of cabinets, kitchen size, layout complexity, installer experience, site conditions, trim requirements, and whether plumbing or electrical modifications are involved. A simple cabinet run may be much faster to install than a kitchen with multiple corners, tall cabinets, appliance panels, crown molding, fillers, and uneven walls or floors.
Are Kitchen Cabinets Difficult to Install?
Installing kitchen cabinets requires more precision than many basic home improvement projects. The installer needs to measure accurately, establish level reference lines, locate structural mounting points, shim boxes correctly, connect neighboring cabinets, and safely lift wall cabinets. Homeowners with solid DIY and carpentry skills may be comfortable with the work, while more complex kitchens often benefit from professional installation.
How Do You Install Cabinet Handles Evenly?
A cabinet hardware template or drilling jig is one of the easiest ways to keep handles and pulls aligned. Choose and test the placement on one cabinet first, then use the same template setting or reference measurements on comparable doors and drawers. Confirm two-hole pull spacing before drilling and avoid measuring each cabinet independently whenever possible.
How Much Does Cabinet Installation Cost?
Cabinet installation pricing depends on the number and type of cabinets, kitchen layout, site conditions, trim details, custom fitting requirements, and local labor costs. Additional demolition, plumbing, electrical work, wall corrections, and decorative finishing can also affect the total. For the most useful estimate, have the actual cabinet plan and installation space evaluated instead of relying only on a general average.