To make oak kitchen cabinets look modern, start by simplifying the finishes around them. Updated hardware, coordinated wall colors, a quieter backsplash, and better lighting can give existing oak a more intentional appearance. If the cabinet color or door shape still feels wrong, refinishing, painting, or replacing the fronts may be the next step.
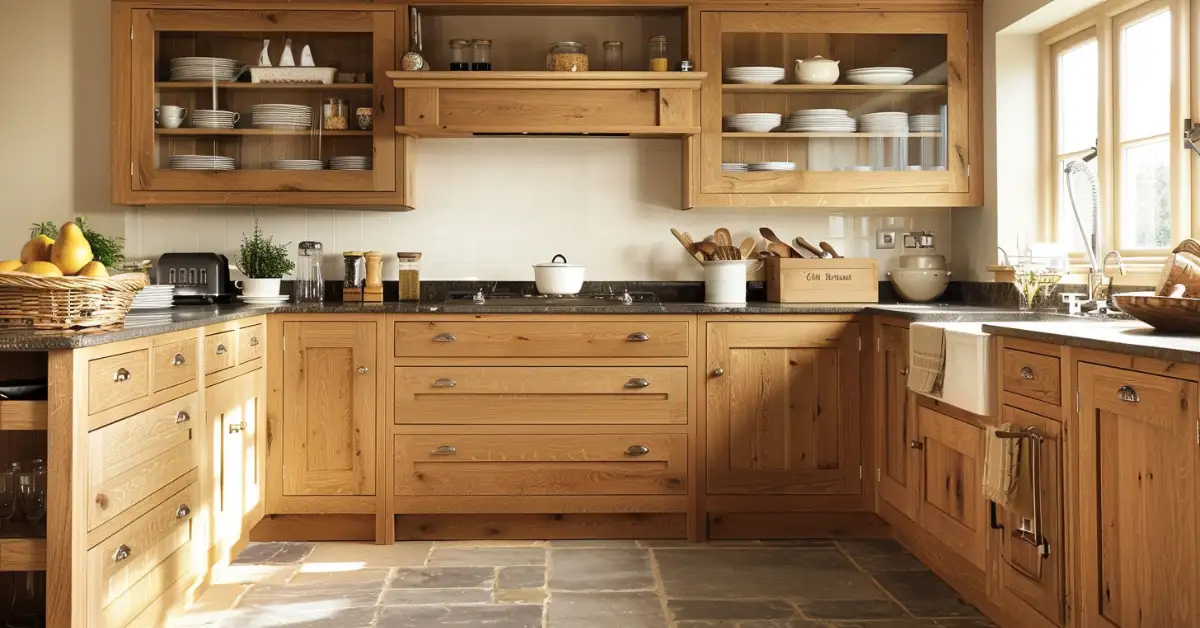
Honey oak cabinets have a golden, amber, or orange-toned appearance that can be especially noticeable beside other warm finishes. That color deserves consideration, but so do the door profile, countertop pattern, flooring, and amount of visual detail in the room. Changing the right combination of elements often matters more than changing the wood itself.
At Columbus Cabinets City, we recommend deciding what you want to keep before choosing anything new. This guide explains how to assess your cabinets, coordinate the surrounding materials, and choose updates that fit the kitchen you already have.
Decide What Actually Needs Updating
Before selecting paint colors or ordering handles, inspect the cabinets closely. Look inside the sink base for moisture damage, check whether shelves remain secure, and open every door and drawer. Loose hardware may be repairable, while deteriorated cabinet bottoms, failing joints, or widespread swelling can make a cosmetic update a poor investment. Attractive finishes will not resolve problems with the underlying construction.
Next, separate your concerns into appearance and function. You might like the oak but dislike the orange finish, or appreciate the storage while wanting simpler doors. Alternatively, the cabinets may look acceptable but leave you struggling with awkward corners and insufficient drawer space. Identifying the actual problem helps you avoid spending heavily on a kitchen that still frustrates you.
| What bothers you most? | Update worth considering |
|---|---|
| Dated handles, wall color, or decorative details | Hardware and surrounding-finish refresh |
| Worn finish or an unwanted stain color | Professional refinishing assessment |
| Wood color you do not want to retain | Cabinet painting |
| Arched or heavily detailed doors | New fronts or cabinet refacing |
| Damaged boxes or an unsuitable layout | Cabinet replacement or a broader redesign |
Choose the scope before ordering permanent materials. If you expect to replace the cabinets soon, installing new countertops first can create unnecessary complications. Countertops are fabricated around the existing cabinet arrangement, so later changes to the layout, cabinet dimensions, or support conditions may affect whether they can be reused.
Build a Color Palette Around Your Existing Oak
Oak cabinets do not all have the same undertone. Some appear yellow-gold, others lean orange or reddish, and others have a more neutral brown finish. “Honey oak” describes an appearance rather than identifying the wood species or exact stain. Start with the cabinets in your room instead of assuming that a palette from an inspiration photo will produce the same result.
Place large paint samples beside the cabinets, countertop, flooring, and trim. Check them during daylight and under the lights you use in the evening. A wall color that seems neutral on its own may look pink, green, or overly yellow beside the other materials. We recommend choosing from samples viewed together rather than buying each finish separately.
Wall Colors for Honey Oak Cabinets
Soft off-whites, restrained warm neutrals, and some muted greens can provide useful starting points. The right choice depends on the surfaces staying in the kitchen. If you have a cream countertop and warm tile floor, an icy white wall may make those finishes look more yellow. A softer white may connect them more comfortably without adding another strong color.
Color contrast also deserves attention. A blue or blue-green wall can create an attractive contrast with orange-toned oak, but it may make the cabinet warmth more noticeable. That can work when you enjoy the wood color. If your goal is to make the orange less prominent, compare quieter neutrals before committing to a complementary color.
Coordinate the Trim and Nearby Rooms
The kitchen palette should account for visible door casings, baseboards, windows, and adjoining spaces. Painting the walls a crisp white while leaving strongly yellow trim can create a new mismatch. Likewise, a kitchen with warm oak cabinets may feel disconnected if every surrounding finish suddenly shifts to a cold gray.
You do not need identical colors throughout the house. Instead, look for a shared element, such as a compatible white, a repeated metal finish, or a similar level of warmth. This gives the kitchen a relationship with nearby rooms while allowing its cabinetry and materials to have their own character.
Choose Hardware That Fits the Doors
Changing the hardware on oak cabinets is a focused way to introduce cleaner lines. Simple bar pulls, understated knobs, and restrained curved handles can work with existing wood doors. The best option depends on the size of the rails and stiles, the cabinet proportions, and how much contrast you want the hardware to create.
Matte black offers a distinct outline against golden oak. Brushed nickel gives a softer contrast, while brushed brass can continue the warmth of the wood. None is automatically the correct choice. Compare actual samples against the cabinet finish, and consider whether the faucet, lighting, and visible hinges will support the same direction.
Check Hole Spacing Before Buying Pulls
For replacement pulls, measure the distance between the centers of the existing screw holes. This is different from the overall handle length. Matching the existing spacing can avoid extra drilling and visible repairs, which is particularly useful when you intend to keep stained oak rather than cover it with paint.
Also check the footprint of the old hardware. A replacement knob or pull may expose a darker outline, worn finish, or indentation underneath. Test one door before ordering the entire set. If the new design requires different holes, decide how those repairs will look in the finished wood before proceeding.
Consider Comfort, Placement, and Hinges
A handle should feel comfortable when opening a heavy drawer or a frequently used cabinet. Check finger clearance and whether neighboring pulls could collide at corners. On paneled doors, the available flat mounting area matters as much as the hardware style. Oversized handles can look awkward when squeezed onto narrow framing.
Visible hinges also affect the finished appearance. Replacing exposed hinges with concealed ones is not always a simple swap because door construction, overlay, and cabinet framing influence compatibility. If hidden hinges are part of your plan, have the door and cabinet arrangement assessed before purchasing parts or drilling.
Simplify the Countertop and Backsplash Together
Oak already contributes grain, color variation, and texture. When a countertop and backsplash both introduce strong patterns, the kitchen can feel crowded. We recommend choosing which surface should attract attention and allowing the others to provide a quieter background. This is especially useful when the cabinet doors also have raised panels or decorative edges.
A pale countertop with restrained movement can lighten the overall palette, while a darker, quieter surface can create a more defined contrast. If you are considering quartz countertops, compare the sample’s background color and veining directly with the oak. A white label or product photo will not reveal every undertone you see in the room.
For the backsplash, consider simple tile shapes, a limited palette, and grout that supports the effect you want. Closely matched grout can reduce the prominence of the tile grid. Contrasting grout makes the pattern more visible, which may suit some kitchens but adds another layer of detail beside pronounced oak grain.
If the existing countertop will remain, use it as a fixed reference when choosing the backsplash. A fresh white tile can look disconnected beside a cream or beige countertop if their undertones conflict. Take samples home, position them vertically, and view the countertop and tile together before making the final selection.
Improve Lighting Before Finalizing Colors
Lighting changes how the entire material palette appears. Very warm light can emphasize golden cabinet tones, while cooler light may make warm wood stand out against nearby whites. Neither effect is inherently wrong, but it can change whether you like a paint or countertop sample. Evaluate finishes under the lighting you intend to keep.
Use a coordinated lighting plan rather than relying on one bright ceiling fixture. General lighting supports movement through the room, task lighting illuminates work surfaces, and pendants can define an island or dining area. Under-cabinet lighting is particularly useful where upper cabinets cast shadows across the countertop and backsplash.
When choosing fixtures, consider both their appearance and their practical effect. A large decorative pendant may become visually dominant in a small kitchen, while an enclosed shade may direct light differently than you expect. For electrical alterations or hardwired additions, involve a qualified electrician rather than treating the work as a decorative accessory change.
Make Flooring and Wood Tones Work Together
An oak cabinet kitchen can include wood flooring without requiring an exact match. What matters is whether the tones and patterns look deliberate together. A floor that nearly matches the cabinets but has a noticeably different orange, pink, or gray cast can be harder to coordinate than a clear contrast in depth or color.
If the flooring is staying, build your new selections around it. Introducing gray flooring solely to make honey oak seem more modern can leave the warm cabinets looking disconnected. Conversely, a warm floor does not require every new surface to be beige. A restrained palette can include contrast while retaining a connection between materials.
For kitchens with oak floors, oak cabinets, and oak trim, look for opportunities to interrupt the continuous wood coverage. Painted walls, quieter countertops, simple window treatments, and carefully chosen furnishings can provide visual relief. You can preserve the wood character while giving the eye places to rest.
Reduce Decorative Detail Where It Matters
Sometimes the dated impression comes from the collection of details around the cabinets. Scalloped valances, ornate light fixtures, heavy window treatments, decorative wallpaper borders, and crowded countertop displays can make the room feel busier. Addressing a few prominent features may produce a more noticeable improvement than adding new accessories.
Start with changes that do not compromise useful storage or cabinetry. Simplify the window treatment, clear the space above the cabinets, and reduce countertop items to what you use regularly. If you want to remove an attached valance or trim piece, check how it is secured and whether unfinished surfaces will be exposed.
Open shelving is optional. Removing upper cabinets can reduce storage, expose wall damage, and create a need for finished cabinet ends or wall repairs. Keep enclosed cabinets where they serve the kitchen well. A modern appearance should support daily use rather than require a constantly styled display.
Choose Refinishing, Painting, or New Doors for a Larger Change
If the surrounding updates will not address what you dislike, consider changing the cabinets themselves. Refinishing changes the existing finish, painting covers the wood color, and replacing fronts changes the door design. These approaches solve different problems, so compare them against your desired result instead of treating them as interchangeable.
We recommend reviewing a finished sample before committing to an entire kitchen. For stained cabinets, a sample should show the wood and finish together. For painted oak, it should demonstrate how much grain texture remains visible. For replacement doors, evaluate their appearance beside the face frames, exposed ends, and any cabinetry that will stay.
Restain When You Want to Keep Visible Wood
Restaining may be appropriate when the cabinets are sound and you want a different wood tone. However, an existing finish affects what preparation and coloring system will work. Applying a new stain over a sealed surface is different from staining bare wood, and results should be tested before proceeding across the kitchen.
Moving from a dark or strongly amber finish to a pale appearance can require substantial finish removal and careful preparation. Cabinet parts may also contain different materials, including veneer, that need different handling. A stain color alone cannot turn an existing door into a different wood species, grain pattern, or door construction.
Paint When You Want to Change the Cabinet Color
Painting gives you more freedom to change the palette, but decide whether you are comfortable seeing oak grain through the coating. Paint changes color; it does not automatically erase surface texture. A smoother result may require additional preparation and an appropriate grain-filling system, depending on the finish you expect.
Successful cabinet painting also depends on removing contamination, preparing the existing surface, and selecting compatible products. Follow the coating manufacturer’s instructions for preparation, application, drying, and curing. If you want a highly uniform finish or have extensive wear and repairs, compare a professional painting proposal with other cabinet-update options.
Replace Fronts When the Door Profile Is the Problem
Arched doors and heavily detailed raised panels retain their shape after painting. If you want simpler geometry, new fronts may address the issue more directly. Shaker-style cabinets use a recessed center panel and surrounding frame, making them an option to consider when comparing cleaner door designs.
Replacement fronts require more than choosing a door you like. Dimensions, overlay, hinge locations, drawer-front attachment, and clearance all matter. The new finish must also coordinate with visible cabinet framing and end panels. Refacing may include treating those exposed surfaces so the kitchen reads as a complete installation.
Three Design Directions for a Modern Kitchen With Oak Cabinets
The most useful oak cabinets kitchen ideas begin with a clear visual direction. Decide whether you want the room to feel light and quiet, warm and layered, or more sharply contrasted. That choice makes it easier to compare samples and reject attractive individual pieces that do not support the overall kitchen.
These combinations are starting points rather than fixed formulas. Keep the cabinet finish, floor, available daylight, and existing countertop in view as you adapt them. A palette that suits pale natural oak may need adjustments beside a deeper honey stain or reddish wood tone.
| Design direction | Materials to explore | Detail to watch |
|---|---|---|
| Light and understated | Soft white walls, pale quiet countertop, brushed nickel hardware | Avoid whites that clash with retained cream surfaces |
| Warm contemporary | Restrained warm neutral walls, subtle stone-look surfaces, brushed brass | Keep enough tonal variation to avoid an overly golden room |
| Defined contrast | Warm off-white walls, dark simple hardware, a quieter backsplash | Check that dark surfaces do not overwhelm limited daylight |
For a small kitchen, preserve useful work surfaces and storage while simplifying the visual field. A few coordinated materials often look more considered than a large assortment of accent finishes. For a larger room, an island can introduce a second cabinet color, but that color should connect with the rest of the palette.
Plan the Work in a Practical Order
Updating oak cabinets becomes easier when you separate planning from installation. Decide the full direction first, even if the work will happen in phases. This lets you choose affordable initial improvements without buying materials that conflict with the next stage.
- Inspect the cabinetry and layout. Identify repairs and decide whether the cabinets will remain.
- Choose the cabinet treatment. Keep the finish, refinish, paint, reface, or replace.
- Assemble the material palette. Compare cabinet, countertop, backsplash, floor, paint, and hardware samples together.
- Confirm dimensions and compatibility. Check hardware holes, door clearances, appliance fit, and any planned cabinet changes.
- Coordinate installation. Complete cabinet work before countertop templating when the work affects cabinet position or dimensions. Coordinate backsplash installation with the countertop.
- Finish with paint, hardware, and styling as appropriate. Protect completed surfaces and follow the installer’s sequence.
If your budget allows only a modest refresh, prioritize the details that bother you most and can be changed independently. New hardware and a carefully selected wall color may be enough for the current phase. Permanent purchases deserve more planning when the longer-term cabinet decision remains unsettled.
Bring the Whole Kitchen Into the Same Design
Making oak kitchen cabinets look modern starts with a realistic assessment of what is worth keeping. Sound cabinets with a finish you enjoy may need a coordinated refresh. Cabinets with the wrong color or door profile may call for more extensive work, while structural or layout problems deserve attention before cosmetic purchases.
At Columbus Cabinets City, we recommend comparing cabinet finishes and surrounding materials as one design. For Columbus-area homeowners planning a larger update, our wood-tone cabinet options can provide a starting point for exploring the appearance you want. A clear plan helps you preserve what works and invest in changes that improve the finished kitchen.
Frequently Asked Questions
Yes. Coordinated hardware, wall color, lighting, countertops, and backsplash can give retained oak a more current appearance. The extent of the change depends on the existing door design and the other materials staying in the kitchen.
First decide whether you want to retain the golden finish. If you do, coordinate the surrounding palette and hardware. If you want a different cabinet appearance, compare refinishing, painting, and new fronts based on the cabinets’ condition and construction.
Simple pulls or knobs in matte black, brushed nickel, or brushed brass are useful options to sample. Choose a shape and finish that suit the doors, and verify existing hole spacing before ordering replacements.
There is no universal color. Restrained neutrals may make the contrast feel gentler, while some blue or green colors can emphasize the orange through contrast. Test large samples beside the actual cabinets, flooring, and countertops.
Refinishing can change their appearance, but it cannot change the wood species or grain. A pale finish may be possible in some cases, but the result depends on the underlying wood, existing color, preparation, and finishing system.
It can. A standard paint application may leave the grain texture visible. Discuss grain filling and surface preparation if your goal is a smoother appearance, and approve a representative sample first.
Only if the shape conflicts with the result you want. New hardware and surrounding finishes can refresh arched doors, but they will retain their traditional profile. Replacing the fronts offers a more direct way to change that geometry.
Make the cabinet decision first. If replacement or layout changes are likely, coordinate those plans before countertop fabrication. New countertops fitted to the current arrangement may not suit a later cabinet redesign.